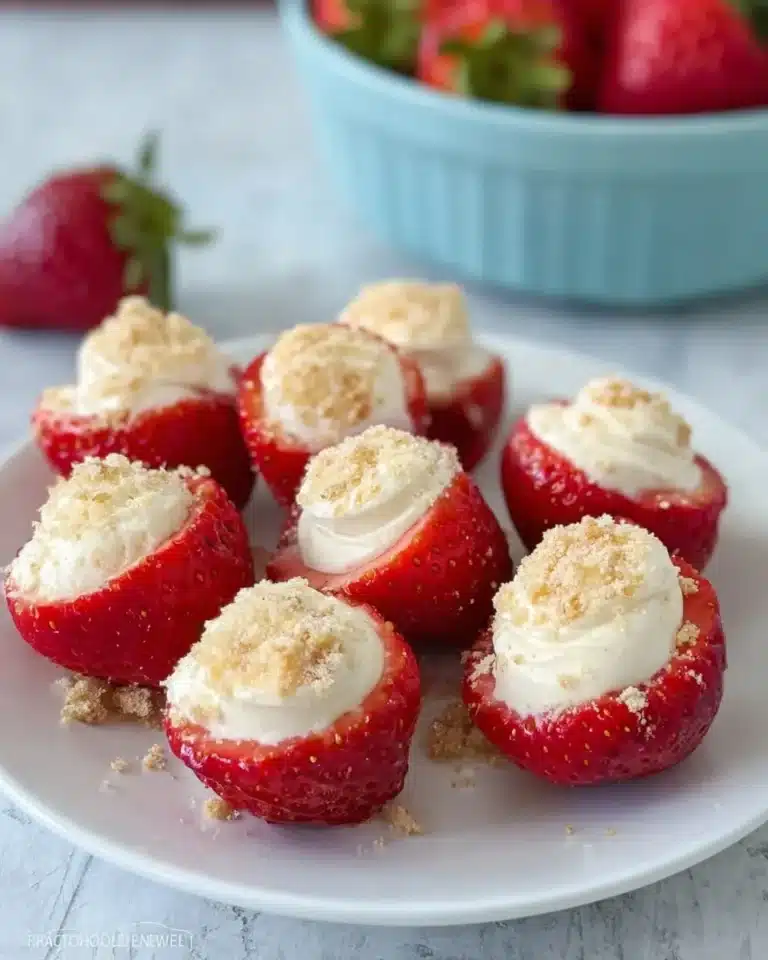
6 Ingredient Cookie Butter Cheesecake Cups

6 Ingredient Cookie Butter Cheesecake Cups are the perfect no-bake dessert when you’re craving something rich, creamy, and easy to make. Emily loves these cheesecake cups because they come together with just six simple ingredients and require no oven at all. The smooth cookie butter filling and crunchy cookie crust create an irresistible combination in every bite. Perfect for parties, holidays, or make-ahead desserts, these individual cheesecake cups are always a crowd favorite.
QUICK ANSWER
These Cookie Butter Cheesecake Cups are a simple no-bake dessert made with creamy cookie butter, cream cheese, and a crunchy cookie crust. Ready with just 6 ingredients and about 20 minutes of prep, they’re perfect for parties, holidays, and make-ahead entertaining.
Why These Are So Irresistible
These no bake Biscoff cheesecake jars deliver big, bold flavor without any fuss. Using only 6 ingredients and coming together fast, they pack that beloved cookie butter flavor in every spoonful. The texture is creamy and fluffy, making each bite feel indulgent but light. Plus, they don’t require any oven time and come in adorable jars, which makes serving and transporting super easy. Prep them a day or two ahead to save time and completely avoid the mess of slicing a whole cheesecake.
Ingredients for 18 Cheesecake Jars
- 8.8 ounces Biscoff cookies (about 25 cookies)
- 6 Tablespoons melted butter
- 24 ounces cream cheese, softened
- 1 14-ounce can sweetened condensed milk
- 1½ cups cookie butter
- 4.4 ounces Biscoff cookies (about 16 cookies), crushed
- 1½ cups heavy cream, cold
Assembling the Cheesecake Cups
- Soften 24 ounces cream cheese to room temperature.
- Crush 8.8 ounces Biscoff cookies into fine crumbs using a blender, food processor, or a zip-top bag and rolling pin.
- Mix cookie crumbs with 6 tablespoons melted butter until the mixture resembles wet sand.
- Spoon about 1½ tablespoons of the crumb mixture into the bottom of each 6-ounce jar and press gently to form an even crust.
- If the crust feels oily, chill the jars for a few minutes before adding the filling.
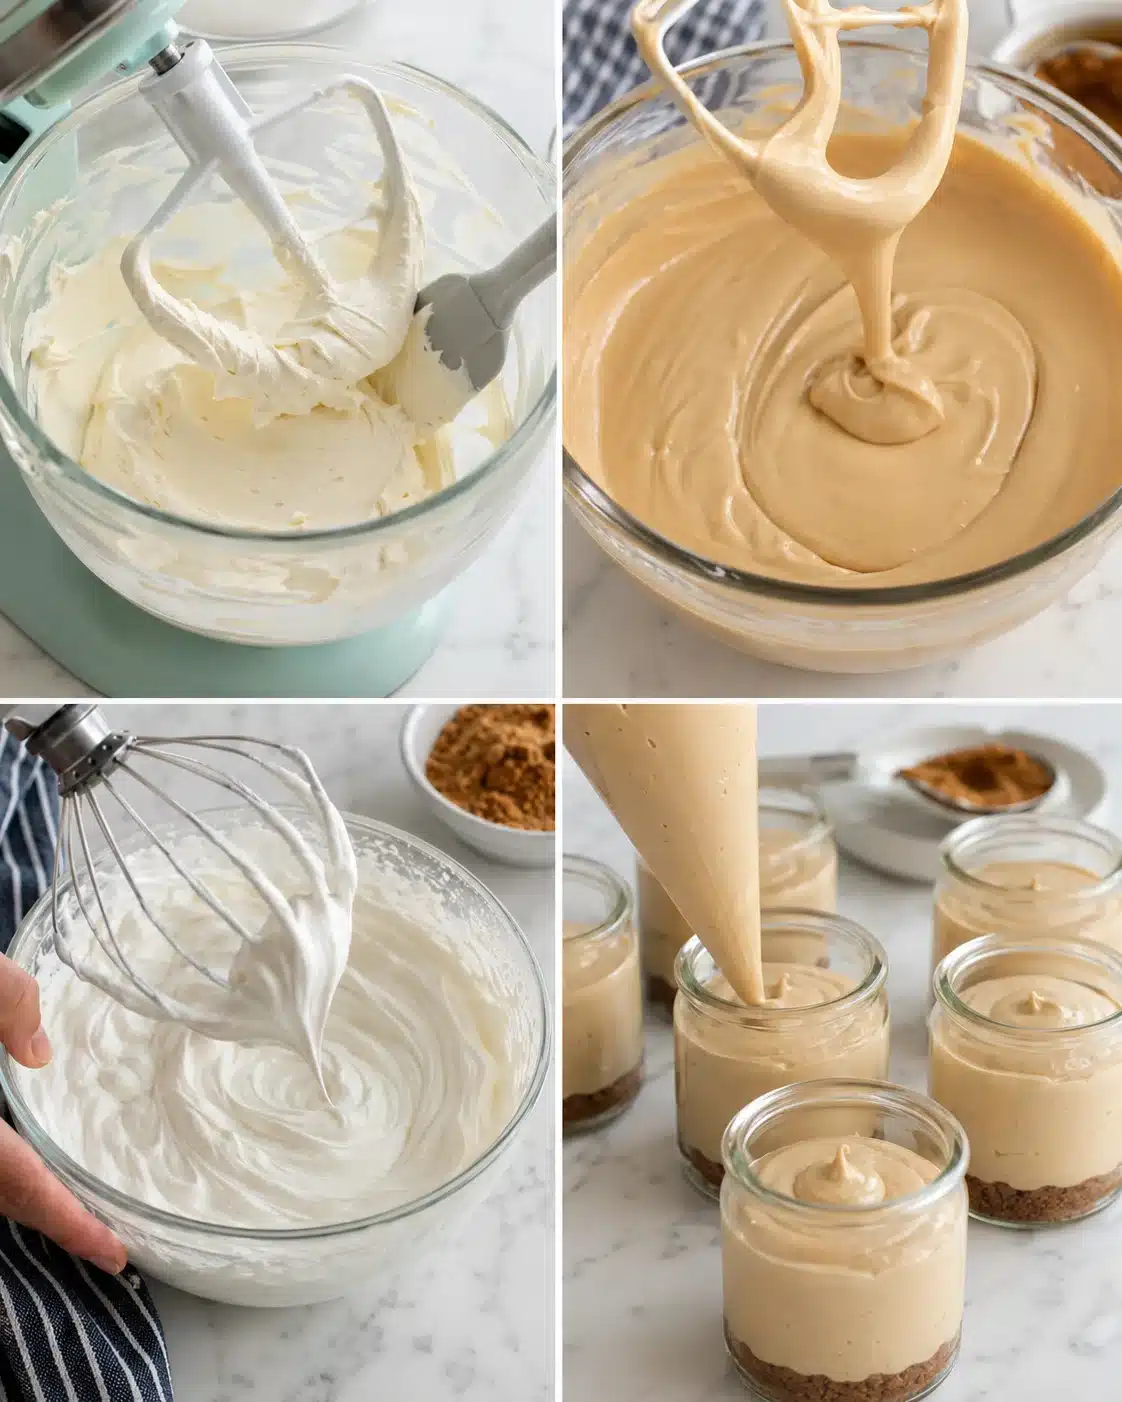
- Beat the softened cream cheese in a mixer until smooth, scraping down the sides as needed.
- Slowly pour the 14-ounce can of sweetened condensed milk into the cream cheese in batches, mixing well after each addition.
- Stir in 1½ cups cookie butter until the filling is smooth and evenly colored.
- Optional: fold in the crushed 4.4 ounces of Biscoff cookies for extra crunch.
- With the mixer on medium-low, slowly drizzle in 1½ cups cold heavy cream, then increase speed to high and whip until the filling is light, fluffy, and holds soft peaks.
- If you don’t have a stand mixer, whip the cold heavy cream to soft peaks separately and gently fold it into the cream cheese mixture.
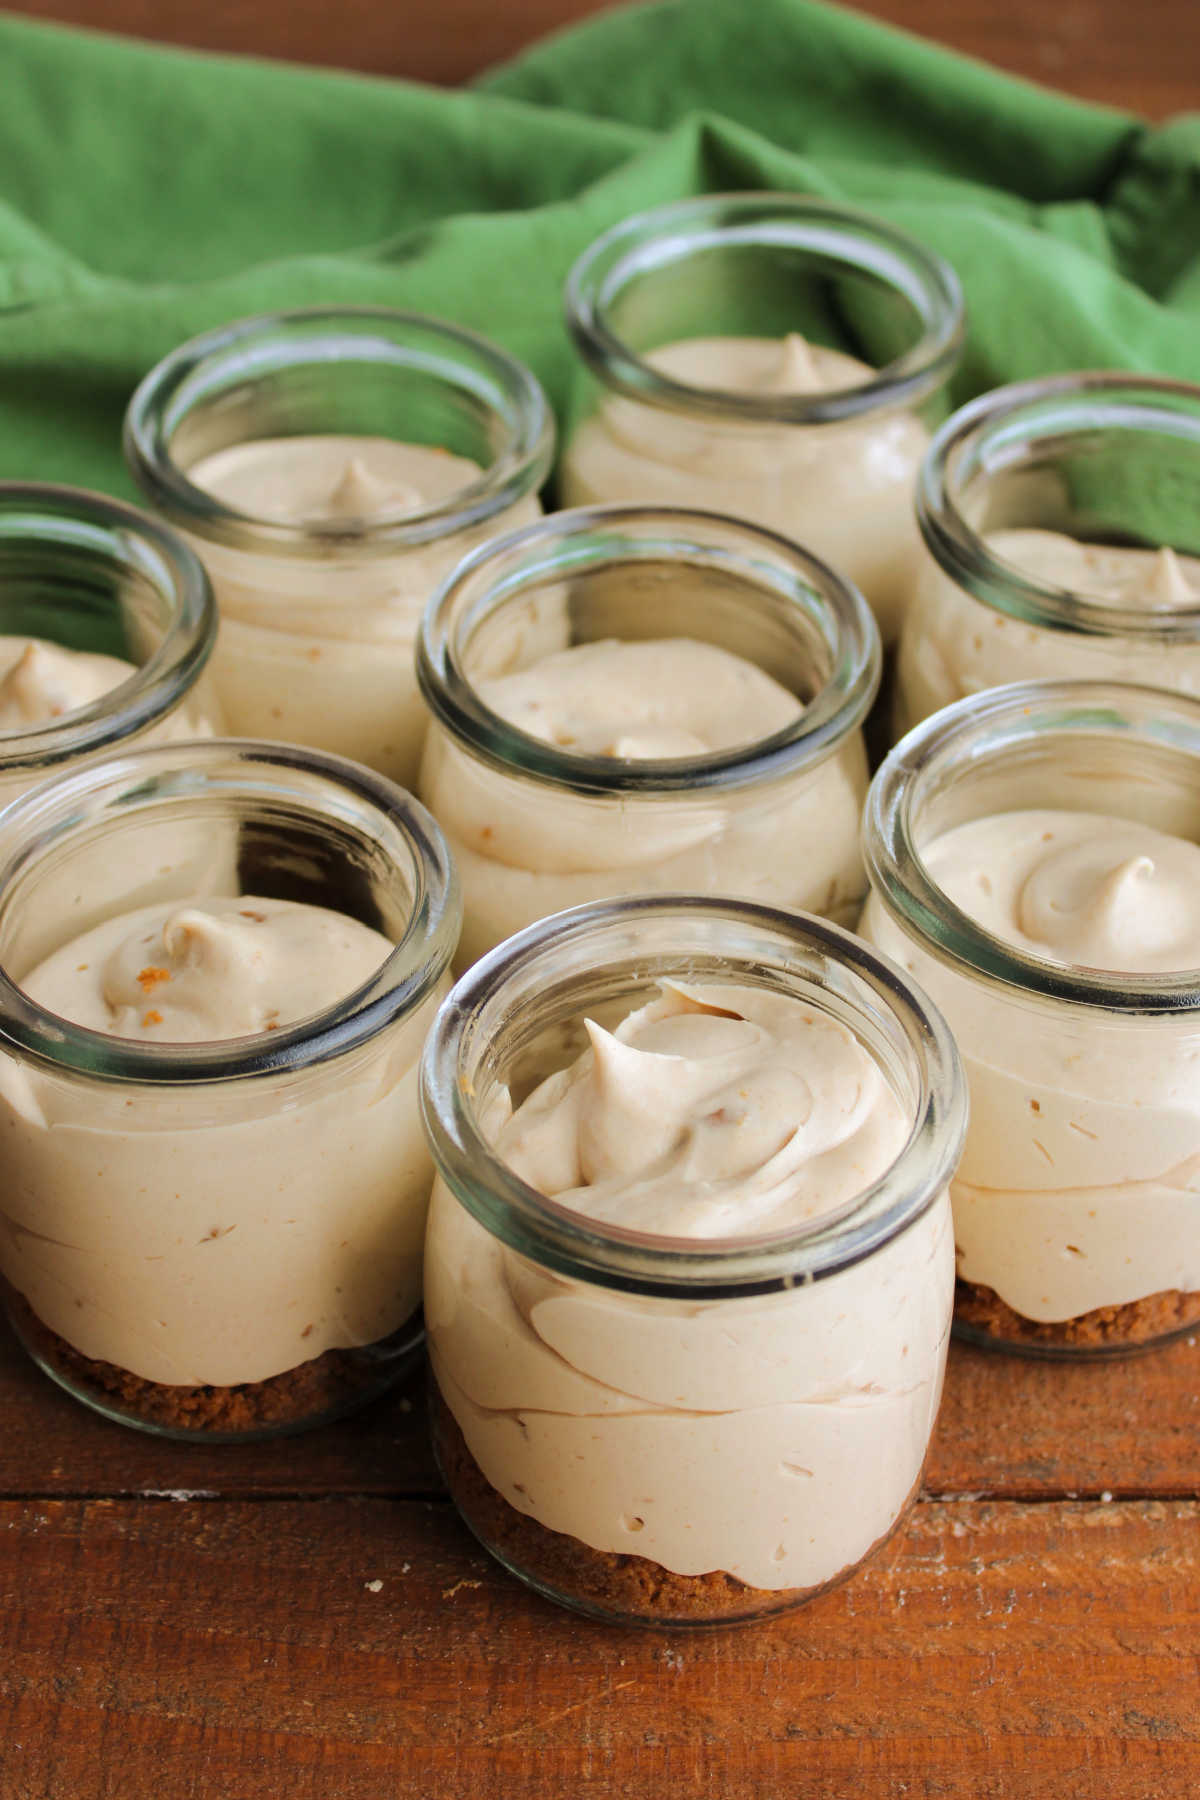
- Spoon or pipe the cheesecake filling evenly over the cookie crust in each jar, leaving a little space at the top.
- Refrigerate the filled jars for at least 1 to 2 hours to let the filling set.
Pro Tips for Texture and Serving
- Make sure your cream cheese is softened to room temperature; this helps it blend silky smooth without lumps.
- Keep your heavy cream cold until you’re ready to whip it—that’s the secret to the fluffiest texture.
- If you don’t have a stand mixer, whip the cream separately to soft peaks and gently fold it into the cream cheese mixture for a light, airy filling.
- Be careful not to overmix after adding the cream, or you risk losing the fluffiness and ending up with a denser filling.
- If you want a polished look, try piping the filling into jars instead of spooning it.
- Press the crust firmly enough to hold together but not so much that it gets greasy. You can chill the crust in the jars for a few minutes if it feels oily before adding the filling.
- If you prefer fewer cookie chunks, crush the extra cookies more finely or skip adding them into the filling.
- When transporting, keep the jars upright in a cooler or flat box with ice packs so they stay chilled and don’t spill.
- Serve these jars as individual desserts at dinner parties, potlucks, or holiday gatherings. Their individual portions make serving a breeze.
- Add a half cookie or a dollop of warmed cookie butter on top for a pretty finishing touch.
- Pair with fresh berries or a sprinkle of sea salt to balance the sweetness.
- Bring them to picnics or outdoor events—just keep them chilled in a cooler until ready to eat.
Flavor Swaps and Mix-Ins
- Swap the crust for graham crackers, gingersnaps, or chocolate cookies to change up the flavor profile.
- Try drizzling some warmed cookie butter on top for a gorgeous swirl and an extra hit of flavor.
- Add a spoonful of salted caramel on top or between layers for a sweet-and-salty twist that’s out of this world.
- Stir in mini chocolate chips or add a thin chocolate ganache layer between the crust and filling if you want a chocolate lover’s dream.
- To make a larger cheesecake, pour the same filling into an 8 or 9-inch springform pan, chill overnight until firm, then slice and serve.
- Try swapping the Biscoff cookie crust for alternatives like graham crackers, gingersnaps, or chocolate cookies to mix up flavors and textures.
- Add fold-ins like mini chocolate chips or sprinkle toasted nuts in the filling for a fun twist.
- Top with a salted caramel drizzle or chocolate ganache for extra indulgence.
- For a larger dessert, pour this filling into a bigger pan and chill overnight to slice for a classic cheesecake presentation.
- Use crunchy or smooth cookie butter depending on your texture preference.
Storage, Make-Ahead, and Thawing
- Keep your cheesecake jars covered and refrigerated for up to 2 days—they stay super fresh and creamy this way.
- Freezing isn’t the best option since the whipped cream might change texture, but if you need to freeze, cover tightly and freeze up to 1 month. Thaw overnight in the fridge and consider rewhipping a bit of fresh cream and folding it in to refresh the filling.
- You can make the cheesecake filling ahead of time and keep it in a bowl, then fill the jars 24 to 48 hours before serving. Hold off on delicate toppings until just before you serve.
- If you’re bringing these jars somewhere, pack them upright in a cooler or insulated bag with ice packs to keep them chilled and safe during transport.
Keep these no bake Biscoff cheesecake jars stored in the fridge with lids on—they stay creamy and fresh for about 1 to 2 days. For best taste and texture, enjoy them within that time frame. If you need to freeze, wrap tightly to prevent freezer burn, but know the whipped cream may lose some fluffiness. Thaw slowly in the fridge overnight, and consider whipping up a little fresh cream to fold in before serving to perk it back up.
This no bake Biscoff cheesecake recipe is a dream for busy days since you can prep everything ahead. Make the crust and filling separately or all the way through, then fill the jars 1 to 2 days before your event. Keep them chilled and add any delicate toppings, like cookie halves or drizzled cookie butter, right before serving to keep them looking their best.
Common Questions Answered
- Can I use store-bought cookie butter? Absolutely! Smooth cookie butter works perfectly, and if you love extra crunch, crunchy cookie butter is great too.
- How long should I chill the jars? Aim for at least 1 to 2 hours to get the filling set nicely, but chilling overnight gives the best, firmest texture.
- Can I make this in a big pan instead of jars? Yes! Press the crust into an 8 or 9-inch springform pan, pour the filling on top, chill overnight, and then slice to serve.
- How long do these keep? When stored covered in the fridge, they stay at their best for about 1 to 2 days.
- Can I use reduced-fat cream cheese or milk? Reduced-fat versions might change the texture and richness. Full-fat cream cheese and heavy cream give you that creamy, fluffy texture everyone loves.
- Do I have to add the extra crushed cookies into the filling? Nope! That’s totally optional. It just adds a little crunch and extra cookie flavor if you want it.
- What if I don’t have cookie butter? You can substitute with peanut butter or Nutella for a different but delicious flavor.
- Can I make this dairy-free? Try using dairy-free cream cheese and coconut cream, but the texture might be a bit different.
- Do I have to use jars? Not at all! Use any small cups or ramekins you have on hand for serving.
- How do I get the filling super fluffy? Make sure your cream cheese is soft and whip your cream cold but not frozen. Whip just until soft peaks form for the best lightness.
- Can I make this gluten-free? Use gluten-free cookies for the crust and crushed cookie bits to keep it safe for gluten sensitivities.