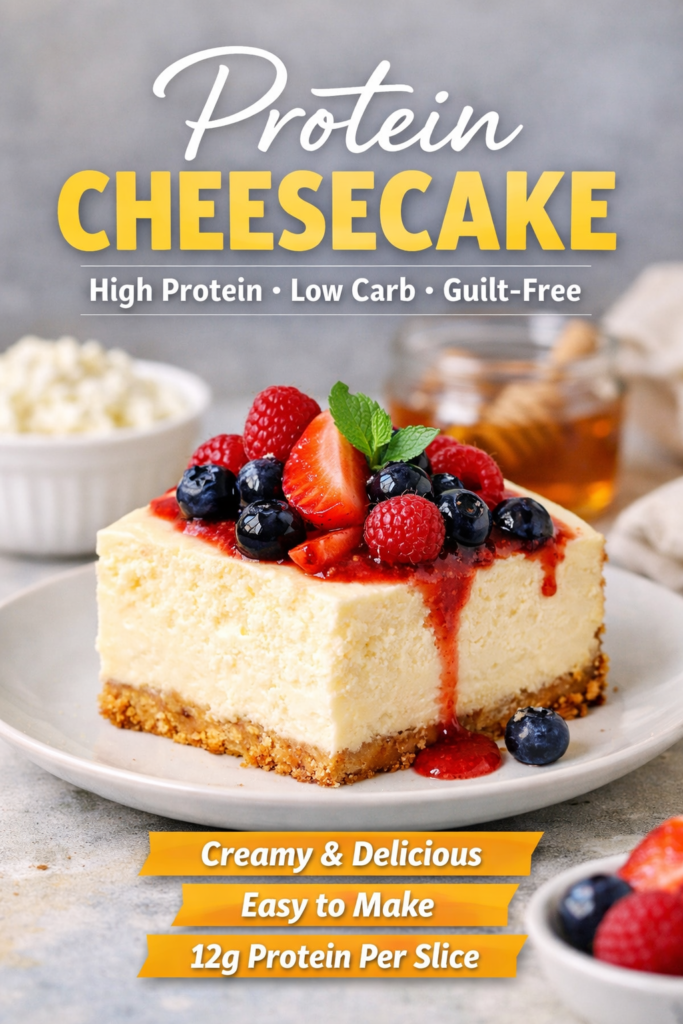
You’ll Never Make Cheesecake This Way Again (High Protein & Guilt-Free)
There’s something about cheesecake that always felt like a special occasion dessert in our home. Growing up, it was the kind of thing my grandmother would make slowly, carefully, letting it chill for hours while the house filled with anticipation.
These days, life looks a little different.
Between Daniel’s busy work schedule and Sophie and Lucas asking for snacks at the most unexpected times, I’ve learned to find ways to bring those comforting desserts into everyday life — just a little lighter, a little simpler, but still just as satisfying.
The first time I made this protein cheesecake, I wasn’t trying to reinvent anything. I just wanted something creamy, sweet, and filling… without that heavy feeling afterward.
And when I saw everyone go back for seconds — especially Daniel, who usually claims he’s “not a dessert person” — I knew this one was staying.

Quick ANSWER
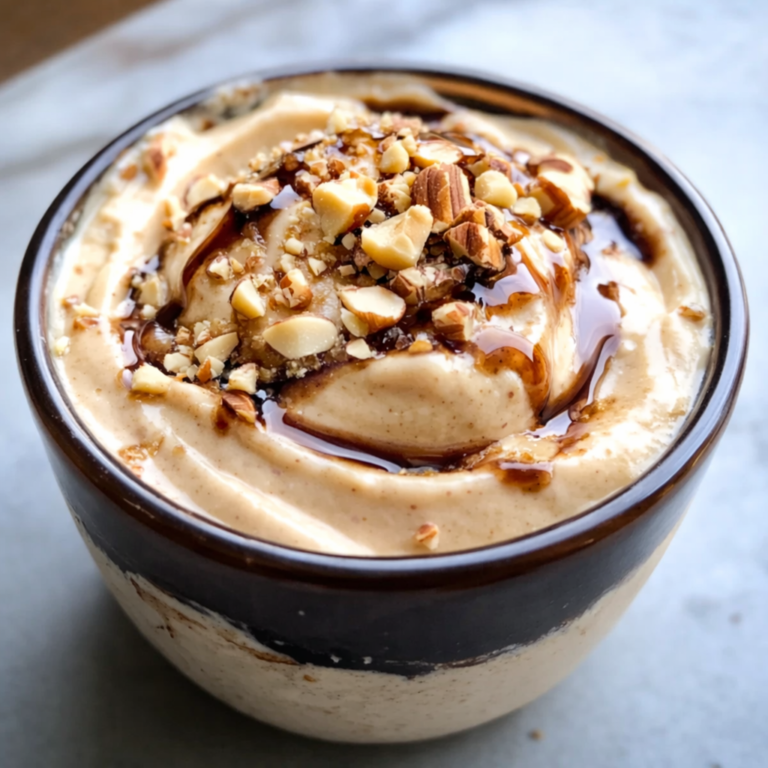
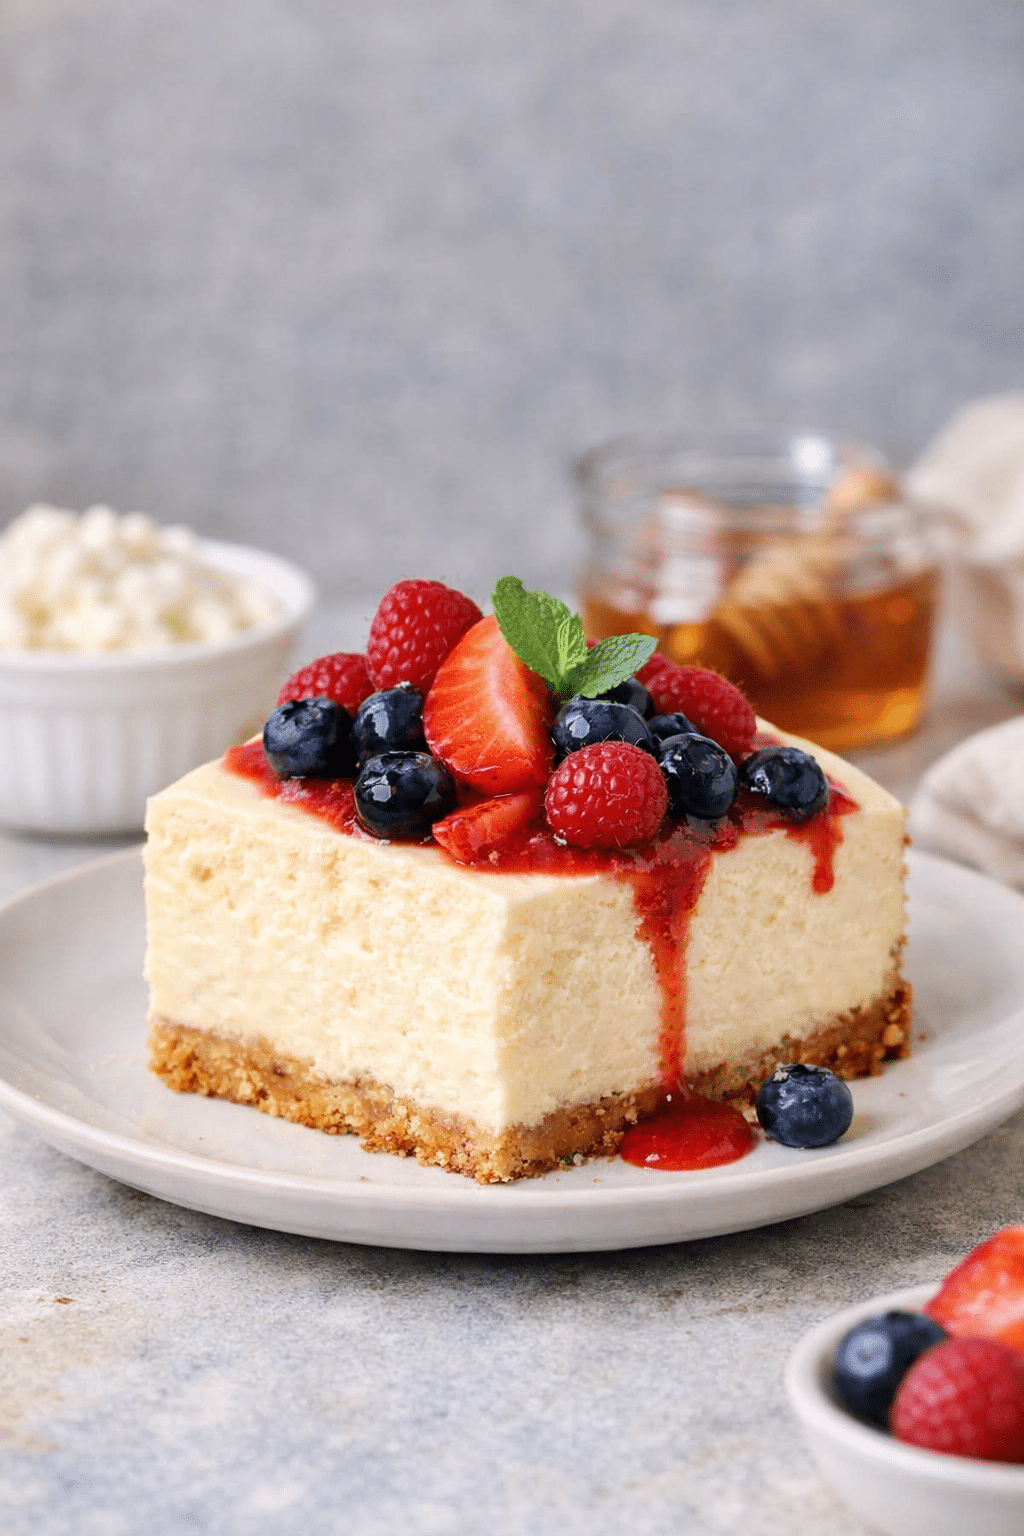
This Protein Cheesecake is a lighter, high-protein version of classic cheesecake made with simple ingredients like cottage cheese or Greek yogurt, eggs, and a natural sweetener. It’s creamy, satisfying, and perfect for a healthy dessert or post-workout treat.
Quick Overview
- Prep Time: 10 minutes
- Cook Time: 35 minutes
- Total Time: 45 minutes + chilling
- Servings: 6 slices
- Protein: ~12–15g per slice
- Best for: Healthy dessert, fitness snacks, meal prep
Why You’ll Love This Recipe

This is one of those recipes that quietly becomes part of your routine.
- It’s creamy and rich, without being heavy
- Packed with protein, so it actually keeps you full
- Made with simple, everyday ingredients
- Perfect for meal prep or late-night cravings
- Easily customizable — sweet, fruity, or even chocolate
Sophie loves it with berries on top, Lucas prefers a drizzle of honey, and Daniel? He eats it straight from the fridge with coffee.
The Origin of This Recipe
This recipe was born out of necessity — and a bit of curiosity.
I kept seeing high-protein desserts everywhere, but many of them felt overly complicated or just didn’t taste right. I wanted something that felt like a real dessert, not a compromise.
So I went back to basics.
Cheesecake is, at its heart, just a balance of creaminess, sweetness, and structure. By swapping in protein-rich ingredients like cottage cheese and Greek yogurt, I realized you could keep that same comforting texture — while making it lighter and more nourishing.
And just like that, this recipe became one of our quiet little kitchen wins.
Ingredients
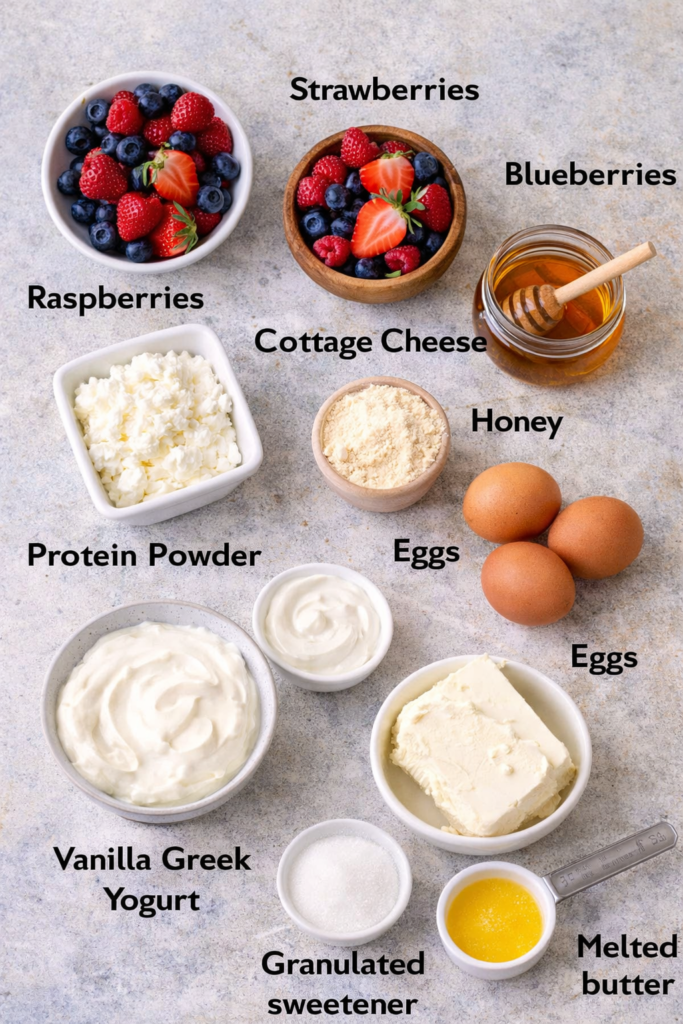
- 1 cup cottage cheese (or Greek yogurt)
- 200g cream cheese (light or regular)
- 2 eggs
- ¼ cup honey or maple syrup
- 1 teaspoon vanilla extract
- 1 tablespoon cornstarch (or flour)
- Optional crust: crushed biscuits + butter
Ingredient Deep Dive
- Cottage cheese: The key to boosting protein while keeping the texture light. Once blended, it becomes completely smooth and neutral in flavor.
- Cream cheese: Adds richness and gives that classic cheesecake body.
- Eggs: Essential for structure — they help the cheesecake set without becoming dry.
- Sweetener: Honey gives warmth, while maple syrup adds depth. Adjust depending on your taste.
- Cornstarch: Stabilizes the mixture and prevents excess moisture.
Instructions
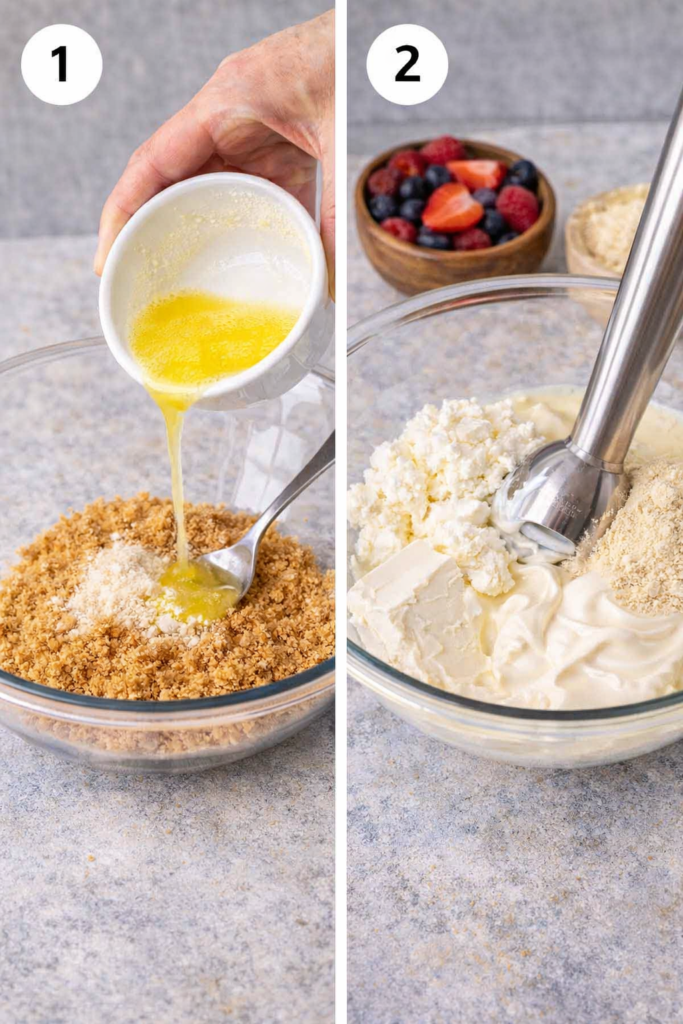
Step 1: Preheat & Prepare
Preheat your oven to 170°C (340°F).
If you’re using a crust, press the crushed biscuits mixed with melted butter into the bottom of a lined pan. Chill briefly so it firms up.
👉 Tip: A firm base prevents a soggy cheesecake later.
Step 2: Blend Until Smooth
In a blender, combine cottage cheese, cream cheese, eggs, honey, vanilla, and cornstarch.
Blend until completely smooth.
👉 Important: This step determines your texture. Any lumps here will stay after baking.
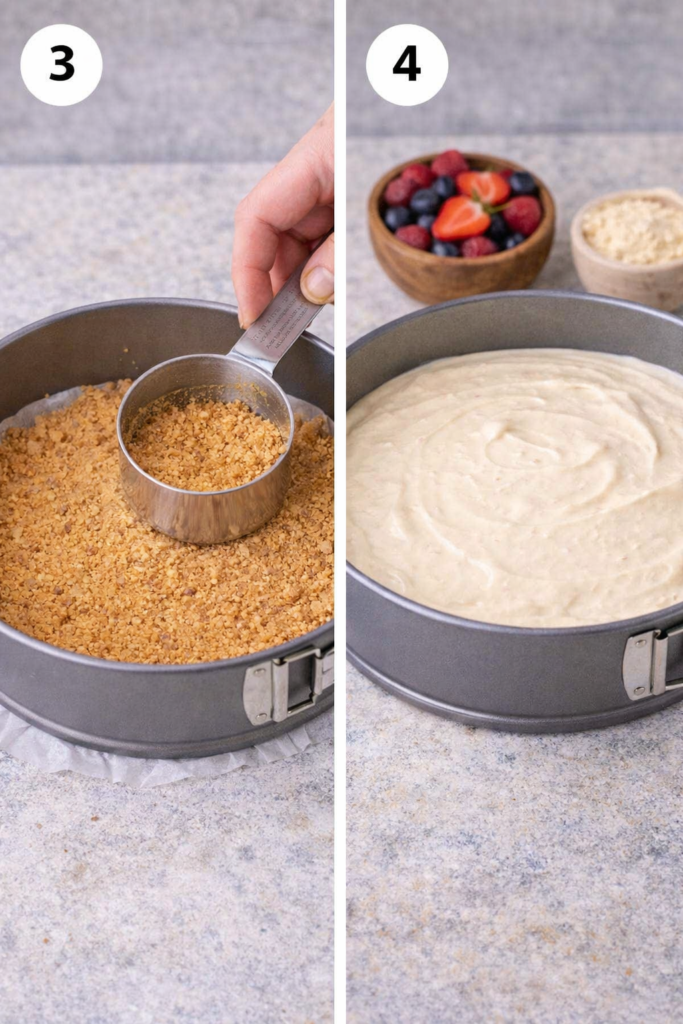
Step 3: Pour & Smooth
Pour the mixture into your prepared pan.
Tap gently on the counter to remove air bubbles.
Step 4: Bake Gently
Bake for 30–35 minutes.
The center should still have a slight jiggle — that’s exactly what you want.
👉 Common mistake: Overbaking leads to a dry, crumbly texture.
Step 5: Cool Slowly
Turn off the oven and leave the cheesecake inside with the door slightly open for 15 minutes.
Then transfer to the fridge and chill for at least 2 hours.
👉 This step gives you that creamy, sliceable texture.
Tips, Variations & Pro Tips

- Blend for ultra-smooth texture
This removes the graininess from cottage cheese and gives a classic cheesecake feel. - Add protein powder (optional)
Boost protein further, but don’t overdo it — too much can make it dense. - Make it chocolate
Add cocoa powder for a richer dessert without extra sugar. - Skip the crust for fewer calories
You’ll still get full flavor with fewer carbs and fat. - Use muffin tins for mini cheesecakes
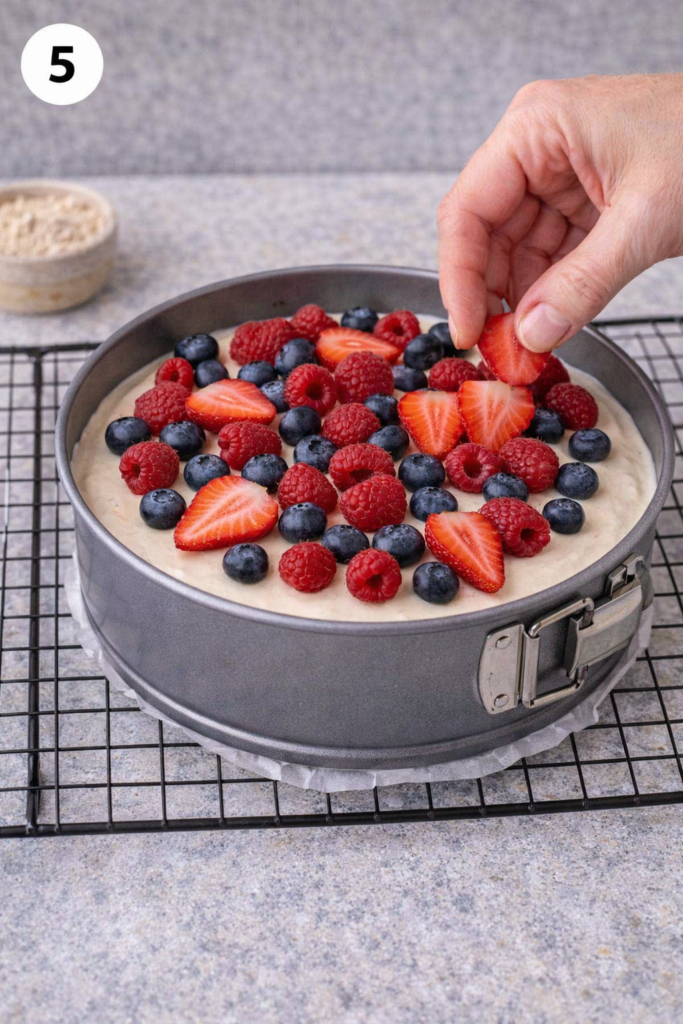
Perfect for portion control and meal prep. - Top it right before serving
Fresh fruit, nut butter, or a drizzle of honey adds contrast and freshness.
Common Myths & Mistakes
Myth 1: Healthy cheesecake can’t taste like real cheesecake
Many people assume that once you make a dessert “healthy,” you automatically lose the indulgent texture and flavor that make it satisfying. This belief comes from past experiences with dry, bland, or overly dense “diet desserts.”
The truth is, the issue isn’t the concept — it’s the execution.
When balanced correctly, ingredients like cottage cheese and Greek yogurt don’t replace cheesecake — they transform it. The creaminess is still there, but lighter. The flavor is still rich, just less overwhelming.
The key is blending properly and not overbaking. When done right, most people won’t even realize it’s a high-protein version.
Myth 2: More protein always makes it better
It’s easy to think that adding extra protein powder will automatically improve a recipe. This idea is heavily promoted in fitness culture, where “more protein” is often seen as better.
But in baking, balance matters more than quantity.
Too much protein powder can make the cheesecake dry, dense, and slightly chalky. It also affects how the dessert sets.
The correct approach is moderation. If you add protein powder, keep it minimal and adjust moisture slightly to compensate.
Myth 3: You need a water bath for every cheesecake
Traditional cheesecake recipes often recommend a water bath to prevent cracking and ensure even baking. While this is helpful in classic recipes, it’s not always necessary for this version.
This myth persists because people apply traditional rules to all variations.
This protein cheesecake is more forgiving due to its lighter structure. Baking at a lower temperature and cooling gradually achieves similar results without the extra step.
Focus on gentle baking and proper cooling — that’s what really makes the difference.
Nutrition Information (Per Serving)
This protein cheesecake isn’t just satisfying — it’s built to support real-life eating, whether you’re focusing on balance, fitness, or simply lighter desserts.
Estimated per slice (based on 6 servings):
- Calories: 200–220 kcal
- Protein: 12–15g
- Carbohydrates: 10–12g
- Fat: 9–11g
- Sugar: 7–9g
What I love most about this is how balanced it feels. You’re not just getting a sweet treat — you’re getting something that actually keeps you satisfied.
On days when I know dinner might be a little lighter, I’ll serve a slice of this afterward, and it genuinely feels like enough. Daniel even started having it as an afternoon snack instead of reaching for something less filling.
Is This Cheesecake Actually Healthy?
I always like to be honest about this — “healthy” can mean different things depending on your goals.
But in this case, this cheesecake checks a lot of important boxes:
✔ Higher in protein than traditional cheesecake
Thanks to cottage cheese and eggs, this dessert helps support satiety and muscle recovery.
✔ Lower in sugar
Using honey or maple syrup (and controlling the amount) keeps sweetness balanced without being overwhelming.
✔ More satisfying
Because of the protein and fat combination, you’re less likely to go back for multiple servings out of hunger.
✔ Flexible for different lifestyles
- Can be made low-carb (no crust + alternative sweetener)
- Works for meal prep
- Fits into most balanced diets
For me, it’s not about labeling foods as “good” or “bad.”
It’s about finding versions that feel good both while eating and after.
And this one does exactly that.
FAQ – Frequently Asked Questions
How long does protein cheesecake last in the fridge?
Protein cheesecake can last up to 4–5 days when stored properly in an airtight container in the refrigerator. For best results, keep it covered to prevent it from absorbing other fridge odors. The texture actually improves after the first day, becoming firmer and creamier. If you’ve added fresh toppings like fruit, it’s better to add those just before serving to maintain freshness.
Can I freeze protein cheesecake without ruining the texture?
Yes, this cheesecake freezes surprisingly well. Slice it first, then wrap individual portions tightly in plastic wrap or store in airtight containers. Freeze for up to 2 months. When ready to eat, let it thaw slowly in the fridge overnight. Avoid microwaving to defrost, as it can affect the texture and make it watery.
Why did my protein cheesecake turn out dense or rubbery?
This usually happens when the batter is overmixed after blending or when too much protein powder is added. Overbaking is another common cause. To fix this, blend just until smooth, avoid adding excessive dry ingredients, and remove the cheesecake while the center still has a slight jiggle. Residual heat will finish the cooking process.
Can I substitute cottage cheese with Greek yogurt?
Absolutely. Greek yogurt is a great alternative and gives a slightly tangier flavor. It also blends more easily, which can help achieve a smoother texture. However, cottage cheese tends to create a slightly richer consistency once blended. Both options work well, so it comes down to personal preference.
How can I make this cheesecake lower in calories?
To reduce calories, you can use light cream cheese, skip the crust, and opt for a low-calorie sweetener instead of honey or maple syrup. You can also reduce the portion size by making mini cheesecakes. These small adjustments can significantly lower the calorie count while keeping the dessert satisfying.
Conclusion
There’s something quietly comforting about having a dessert like this waiting in the fridge.
Not for a special occasion. Not for a celebration. Just… there.
Ready when the day feels long, when you want something sweet without overthinking it, or when you simply need a moment to pause.
That’s what this protein cheesecake has become in our home.
It’s the slice Daniel reaches for with his coffee.
The one Sophie decorates with fruit like it’s her own little creation.
And the one Lucas asks for — even when he’s already had dessert.
It’s simple. It’s reliable. And it fits into real life.
And honestly, those are the recipes that matter most.