Classic All-Butter Pie Crust (For Baked Fruit & Custard Pies)
This Pie Crust Recipe has become my go-to foundation for every baked pie I make at home.
Over time, this Pie Crust Recipe has earned its place as a reliable staple in my kitchen, especially for family gatherings and cozy Sunday desserts.
There’s something almost sacred about making pie dough from scratch. I still remember the first time I made one completely on my own — no recipe card taped to the cabinet, no phone balanced on the counter. Just flour, butter, and the quiet confidence that comes from doing something enough times that it feels like second nature.
On Sunday afternoons, my husband Daniel usually wanders into the kitchen when he smells butter warming slightly in the air. And my kids, Emma and Jack, love watching me roll out the dough — mostly because they know it means something sweet is coming later. Pie crust has become one of those simple rituals in our home. It’s not flashy. It’s not complicated. But it’s the foundation of so many beautiful desserts.

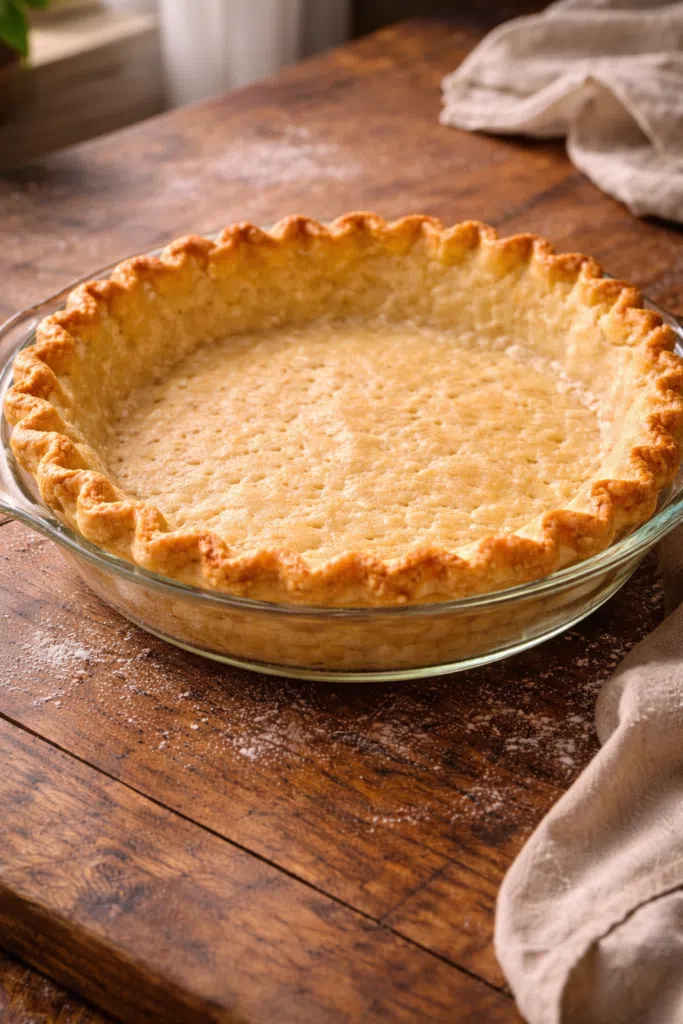
Today I’m sharing my go-to classic all-butter pie crust — perfect for baked fruit pies and custard pies. Flaky, tender, sturdy enough to hold juicy fillings, and forgiving enough for beginners.
Why You’ll Love This Recipe
What makes this Pie Crust Recipe truly reliable is its balance of cold butter and minimal mixing.
- It uses simple pantry ingredients — nothing fancy or hard to find.
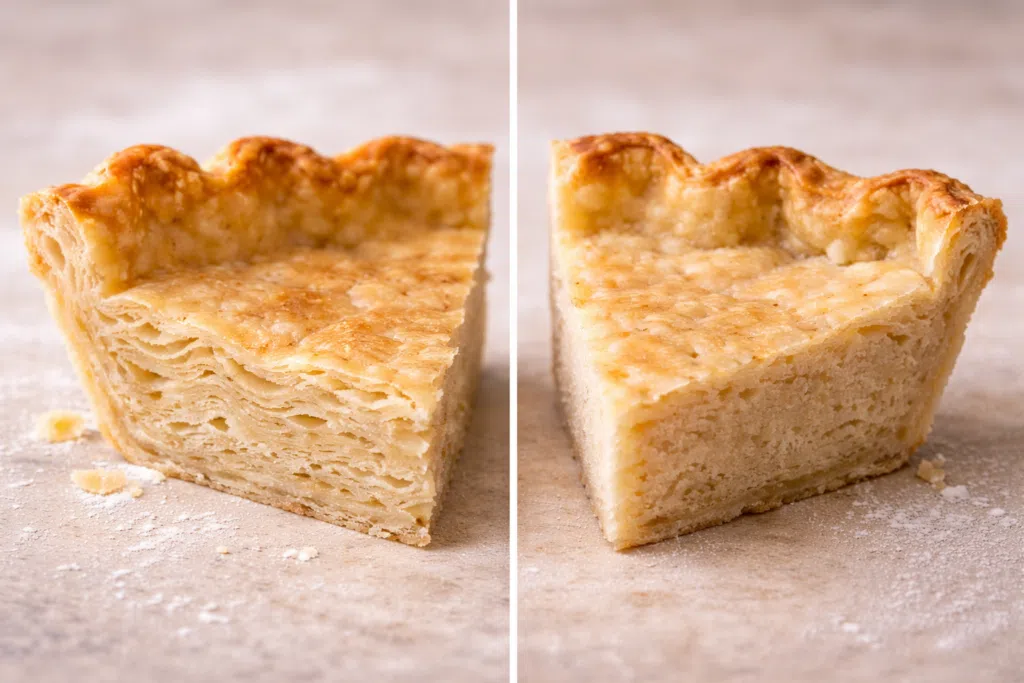
- The texture is beautifully flaky thanks to cold butter.
- It works for fruit pies and custard pies that need baking.
- It’s easy enough for beginners but reliable enough for experienced bakers.
- You can make it ahead and store it safely.

This dough is a classic example of what’s known as shortcrust pastry. Understanding that it’s simply flour coated in fat with just enough water to bind it together makes the process feel far less intimidating.
What makes this Pie Crust Recipe stand out is how simple ingredients transform into something truly special.
Why This Pie Crust Recipe Works Every Time
This Pie Crust Recipe works every time because it relies on one simple principle: cold butter and minimal handling. When butter stays cold, it creates steam pockets in the oven, giving you those flaky layers everyone loves. By avoiding overmixing and adding just enough water, the dough stays tender instead of tough. It’s a method rooted in simplicity — and that’s why it never fails.
The Origin of This Recipe
This is the pie crust I developed after years of trial and error. I used to overwork dough without realizing it. I’d add too much water. I’d panic if it looked crumbly.
It was my grandmother who finally said, “Helen, dough doesn’t like to be fussed over.” That stayed with me.
Now, when I make this crust — especially for something like my classic strawberry rhubarb pie”.
And every time, it works.
Ingredients
This Pie Crust Recipe uses only five basic ingredients, each playing an important role in creating flaky layers.
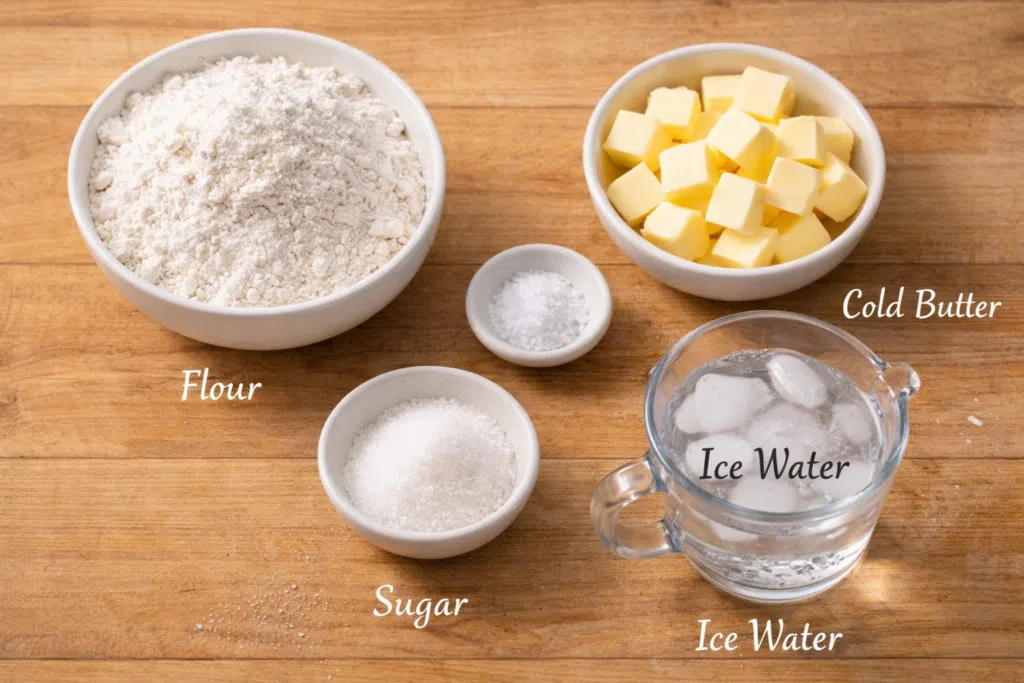
- 2 ½ cups all-purpose flour
- 1 teaspoon fine salt
- 1 teaspoon granulated sugar (optional, but helpful for browning)
- 1 cup (2 sticks) unsalted butter, very cold and cubed
- 6–8 tablespoons ice water
Why These Ingredients Matter
Flour provides structure. All-purpose flour gives the perfect balance — sturdy but not tough.
Salt enhances flavor. Without it, the crust tastes flat.
Sugar doesn’t make it sweet, but it encourages browning and balances fruit fillings.
Cold butter is everything. Those small pieces melt during baking, creating steam pockets — that’s what makes flaky layers.
Ice water binds the dough without melting the butter.
Instructions
Follow these simple steps to master this Pie Crust Recipe, even if it’s your first time making dough from scratch.
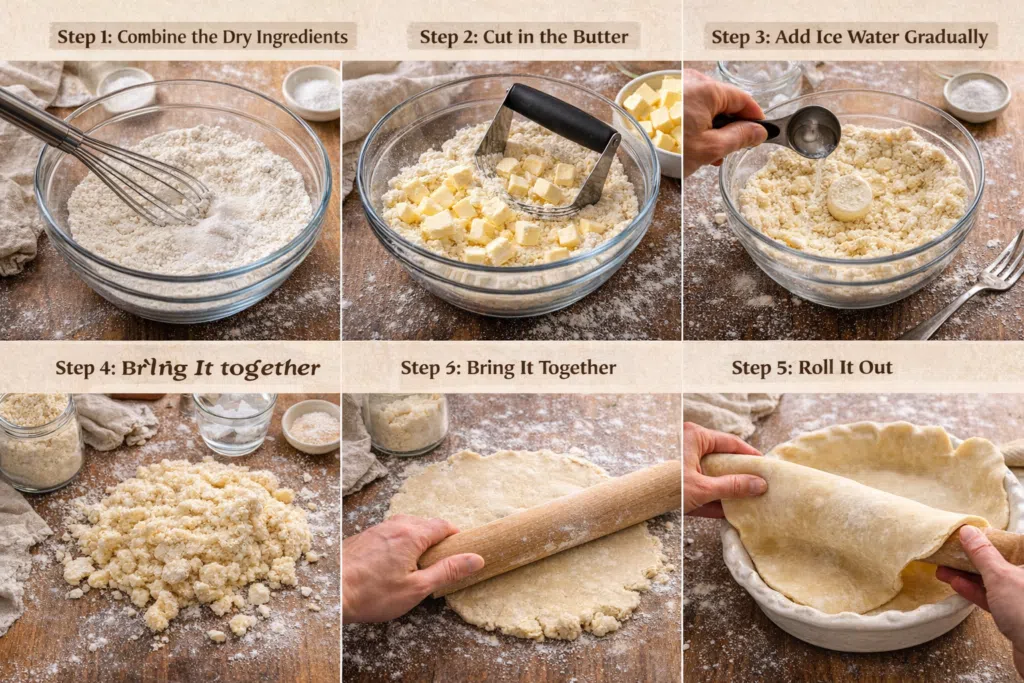
Step 1: Combine the Dry Ingredients
In a large bowl, whisk together the flour, salt, and sugar. This evenly distributes seasoning before adding butter. Skipping this step can lead to uneven flavor.
Step 2: Cut in the Butter
Add the cold butter cubes. Using a pastry cutter (or your fingertips), work the butter into the flour until the mixture resembles coarse crumbs with some pea-sized pieces.
Those visible butter pieces are good. They create flakiness. If the mixture turns pasty, the butter is too warm.
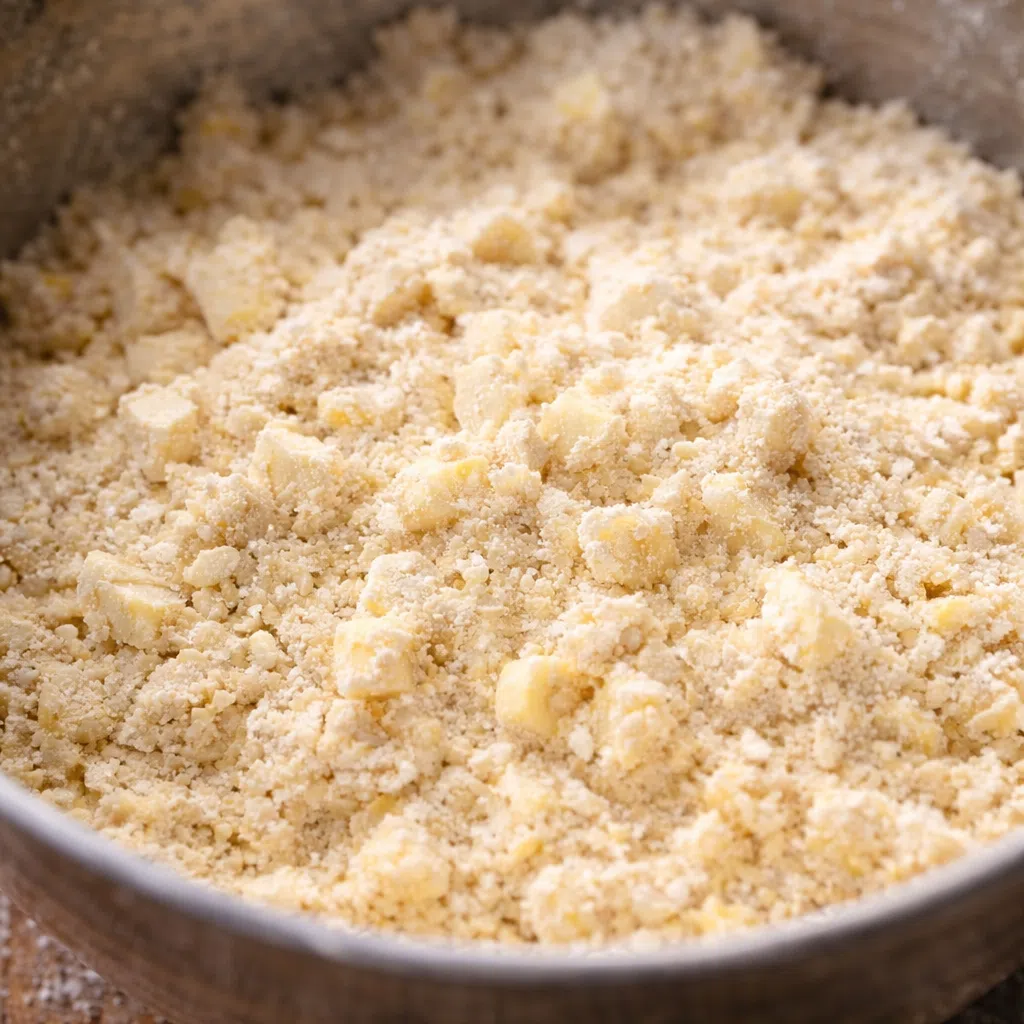
Tip: If your kitchen is warm, pause and refrigerate the bowl for 10 minutes.
Step 3: Add Ice Water Gradually
Add 1 tablespoon of ice water at a time, gently mixing with a fork. The dough should begin to clump but not feel sticky.
Stop as soon as it holds together when pressed between your fingers.
Common mistake: adding too much water. Too much water develops gluten, leading to toughness.
Step 4: Bring It Together
Turn the dough onto a lightly floured surface and gently press it into a disk. Do not knead. Divide into two disks if making a double crust.
Wrap tightly and refrigerate for at least 1 hour.
Resting allows gluten to relax and butter to firm up again.
Step 5: Roll It Out
On a floured surface, roll from the center outward, turning the dough occasionally. Aim for about 1/8-inch thickness.
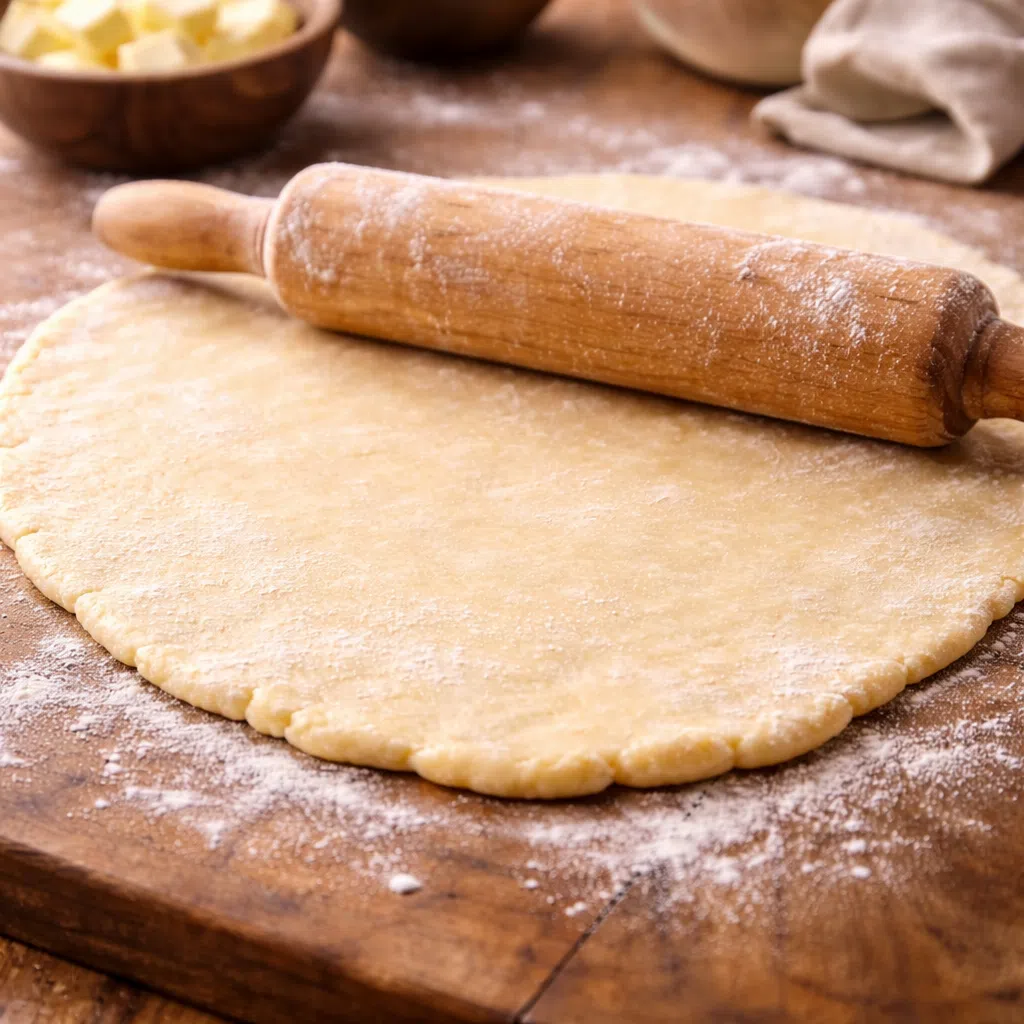
If cracks form, gently press them together. If the dough sticks, add minimal flour.
Step 6: Transfer and Shape
Roll the dough onto your rolling pin and unroll it into your pie dish. Press gently into corners without stretching.
Trim edges and crimp as desired.
Step 7: Blind Bake (If Needed for Custard Pies)
For custard pies, prick the base with a fork, line with parchment, add pie weights, and bake at 375°F (190°C) for about 15 minutes. Remove weights and bake another 5–8 minutes until lightly golden.
For fruit pies, fill and bake as directed in your pie recipe.
Tips & Flavor Variations
- Keep Everything Cold
Cold butter creates steam during baking. If butter melts before baking, you lose flakiness. - Don’t Overmix
Overmixing develops gluten, making crust tough instead of tender. - Use a Metal or Glass Pie Dish
They conduct heat better than ceramic, helping the bottom crisp properly. - Add a Splash of Vinegar (1 teaspoon)
This slightly inhibits gluten formation, improving tenderness without affecting flavor. - Chill After Shaping
Even after placing in the pan, refrigerate 15–20 minutes before baking. This prevents shrinking.
Flavor Variations
- Add ½ teaspoon cinnamon for warm spice notes.
- Use brown sugar instead of white for subtle caramel undertones.
- Replace ¼ cup flour with whole wheat for a nutty flavor.
- Add citrus zest for fruit pies.
- For savory pies, omit sugar entirely.
Common Myths & Mistakes
Myth 1: “The smoother the dough, the better the crust.”
Many beginners believe pie dough should look like smooth bread dough. Social media often shows perfect, seamless balls of dough, which reinforces this idea.
People believe this because smoothness is associated with skill. In bread baking, smooth gluten development is desirable.
But pie crust is different. A smooth dough usually means the butter is overworked and gluten has developed too much. That leads to a dense, tough crust rather than a flaky one.
The correct approach is to stop mixing while the dough still looks slightly shaggy. Visible butter pieces are not a flaw — they are essential. When baked, those small butter pockets create steam and lift the layers. A rustic dough makes a tender crust.
Myth 2: “More water makes dough easier to roll.”
It’s tempting to add extra water when dough seems crumbly. Many people assume more moisture equals easier handling.
This belief comes from working with cookie or bread doughs, where moisture helps elasticity.
However, excess water activates gluten. The more gluten you form, the tougher your crust becomes. Extra water also causes shrinkage during baking.
The correct approach is restraint. Add water slowly and stop when the dough just barely holds together when pressed. If it cracks while rolling, let it rest longer. Resting relaxes gluten naturally and improves flexibility without compromising texture.
Myth 3: “If the crust shrinks, you did something wrong.”
Shrinkage feels like failure. After carefully shaping the edges, seeing them slump inward is discouraging.
People believe shrinkage means they ruined the dough. In reality, it usually comes from stretching the dough when placing it in the pan.
When dough is stretched, it contracts during baking as gluten tightens.
The correct method is to gently lay the dough into the dish without pulling. Let it fall naturally into corners. Then chill it before baking. Cold dough holds its shape far better.
FAQ – Frequently Asked Questions
Why did my pie crust turn out tough instead of flaky?
Tough crust typically comes from overworking the dough or adding too much water. Overmixing develops gluten, which is great for bread but not ideal for pie crust. Also, warm butter blends too thoroughly into flour, eliminating the pockets that create flakiness. Keep butter cold, mix minimally, and chill before rolling.
Can I make this pie crust without a pastry cutter?
Yes, absolutely. You can use your fingertips, working quickly to avoid melting the butter. Some people use two knives in a scissor motion. The key is keeping the butter in small, visible pieces rather than fully blending it in.
How do I prevent a soggy bottom crust?
For fruit pies, bake on the lower rack so the bottom gets direct heat. Using a metal or glass dish helps. For custard pies, blind bake partially before adding filling. You can also brush the base with egg wash and bake briefly to create a moisture barrier.
Why does my dough crack when rolling?
Cracking usually means the dough is too cold or slightly under-hydrated. Let it sit at room temperature for 5–10 minutes before rolling. If cracks appear, gently press them together rather than adding water at that stage.
Can I use salted butter instead of unsalted?
Yes, but reduce added salt by half. Salted butter varies in salt content, so the flavor may differ slightly. Unsalted gives better control, especially for custard pies where subtle flavor matters.
Storage & Make-Ahead Tips
One of the best things about this Pie Crust Recipe is how well it stores and freezes.
This dough stores beautifully, which is one reason I love making it ahead of busy weekends.
In the refrigerator, wrapped tightly in plastic wrap, it will keep for up to 3 days. Make sure it’s sealed well so it doesn’t absorb fridge odors.
For longer storage, freeze the dough disks for up to 3 months. Wrap first in plastic, then place in a freezer-safe bag. Label with the date.
To thaw, transfer to the refrigerator overnight. Avoid thawing at room temperature, as condensation can make the surface sticky and uneven.
If freezing a fully shaped crust in a pan, freeze uncovered until solid, then wrap tightly. Bake directly from frozen — just add a few extra minutes to the baking time.
Once you master this Pie Crust Recipe, you’ll never go back to store-bought crust again.
For best texture, always chill again briefly after rolling out, even if previously refrigerated. That extra chill helps preserve flakiness and prevents shrinkage.
Conclusion
Once you feel confident making this Pie Crust Recipe, everything changes in your kitchen. It stops being intimidating and starts becoming comforting. There’s something incredibly satisfying about knowing you can create a flaky, golden crust from just flour and butter.
This Pie Crust Recipe isn’t about perfection — it’s about patience. It’s about slowing down long enough to let cold butter do its magic and trusting the process. I’ve used this same method for years, whether I’m baking a fruit pie for Sunday dinner or preparing something special for the holidays.
And every time, it reminds me that simple recipes are often the ones that bring the most joy. When Daniel reaches for a second slice and Emma carefully picks the flaky edges off her plate, I know this Pie Crust Recipe has done exactly what it was meant to do — bring us together around the table.
PrintClassic All-Butter Pie Crust
- Total Time: 1 hour 35 minutes (including chilling)
- Diet: Vegetarian
Description
A flaky, tender all-butter pie crust perfect for baked fruit and custard pies. Easy to make with simple pantry ingredients.
Ingredients
-
2 1/2 cups all-purpose flour
-
1 teaspoon fine salt
-
1 teaspoon granulated sugar
-
1 cup unsalted butter, very cold and cubed
-
6–8 tablespoons ice water
Instructions
-
Whisk flour, salt, and sugar together.
-
Cut in cold butter until coarse crumbs form.
-
Add ice water one tablespoon at a time until dough just holds together.
-
Form into disk(s), wrap, and chill 1 hour.
-
Roll out to 1/8-inch thickness.
-
Transfer to pie dish and shape.
-
Blind bake at 375°F for 15 minutes with weights, then 5–8 minutes without if required.
Notes
Store in refrigerator up to 3 days or freeze up to 3 months.
Chill before rolling and before baking to prevent shrinkage.
Do not overmix to maintain flakiness.
- Prep Time: 15 minutes
- Cook Time: 20 minutes (for blind baking)
- Category: Dessert
- Method: Baking
- Cuisine: American
Nutrition
- Serving Size: 2 pie crusts
- Calories: 260 per slice
- Sugar: 1g
- Fat: 18g