Magic 3-Layer Custard Cake (A Calm Kitchen Favorite)
Hi, I’m Helen Whitaker — welcome to Cookliva.
This is one of those recipes that feels a little like kitchen magic, but in the gentlest, most comforting way. The first time I made this 3-layer custard cake, it was a quiet Sunday afternoon. My husband Mark was reading at the table, the kids — Emily and Jack — were coloring nearby, and I wanted something sweet that didn’t feel rushed or complicated.
What came out of the oven honestly surprised all of us. One batter. One pan. Three distinct layers: a soft sponge on top, a creamy custard center, and a delicate, almost flan-like base. Emily called it “a science cake,” Jack asked for a second slice before his first was finished, and Mark — who claims he’s “not a dessert person” — went back for more after dinner.
This is exactly the kind of recipe I love sharing here. It’s calm, patient, and rewards you for slowing down just a little.
Why You’ll Love This Recipe
First, this cake looks impressive without demanding perfection. You don’t need fancy techniques, special tools, or years of baking experience. If you can whisk gently and follow a few simple cues, you can make this cake.
Second, the texture is unlike most desserts. You get contrast in every bite — light, creamy, and tender — without layering or assembling anything by hand. The oven does the work for you.
Third, it’s family-friendly in the best way. Not overly sweet, not heavy, and easy to slice into neat squares. I often serve it slightly chilled, and it’s just as lovely the next day, which makes it perfect for make-ahead baking.
And finally, it’s a reminder that baking doesn’t have to feel stressful. This recipe invites you to trust the process.

The Origin of This Recipe
Magic custard cakes have been around for years, and they became popular because of their almost unbelievable transformation during baking. One thin batter separates into layers based on temperature, moisture, and density.
What drew me to this version was its simplicity. No separating pans, no stacking layers, no fillings or frostings. Just a quiet little miracle happening in your oven while you tidy the kitchen or help with homework.
I’ve tested this recipe many times, adjusting the milk temperature, oven heat, and mixing method until it worked reliably — even on busy days when my attention was divided. That’s the version I’m sharing with you here.
Ingredients (And Why They Matter)
- Eggs
Eggs are the backbone of this recipe. The whites give structure to the sponge layer, while the yolks enrich the custard. Separating them correctly is essential. - Granulated Sugar
Sugar sweetens, of course, but it also stabilizes the egg whites and helps create that tender crumb on top. - Unsalted Butter
Melted butter adds richness and flavor. Let it cool slightly before using — hot butter can scramble the eggs. - All-Purpose Flour
Just a small amount is used. Too much flour would prevent the layers from forming properly. - Milk (Lukewarm)
This is the key ingredient. The high milk ratio creates the custard layer. Lukewarm milk blends smoothly without shocking the batter. - Vanilla Extract
Simple, warm flavor that carries through all three layers. - Salt
A small pinch balances the sweetness and enhances the custard flavor.
Instructions (Step-by-Step, Calmly)
- Prepare your pan and oven
Preheat your oven to 325°F (160°C). Line an 8×8-inch baking pan with parchment paper, leaving a little overhang for easy lifting later. This cake is delicate, so greasing alone isn’t enough. - Separate the eggs carefully
Place yolks in one bowl and whites in another. Make sure there’s no yolk in the whites — even a little fat can prevent proper whipping. - Whip the egg whites
Using a mixer, beat the whites until soft peaks form. You want them fluffy but not stiff. Over-whipped whites make the top layer dry. - Mix the yolk batter
In a separate bowl, beat the egg yolks with sugar until pale and slightly thickened. Add melted butter and vanilla, mixing gently. - Incorporate flour and milk
Add flour and salt, mixing just until combined. Slowly pour in the lukewarm milk while whisking. The batter will be very thin — this is correct. - Fold in the egg whites
Add the whites in three additions, folding gently. Don’t aim for fully smooth — small white streaks are exactly what you want. - Bake patiently
Pour the batter into the pan and bake for 50–60 minutes. The top should be lightly golden and set, with a slight jiggle underneath. - Cool completely
This step matters. Let the cake cool at room temperature, then chill for at least 2 hours before slicing. The layers fully set as it cools.
Tips & Flavor Variations
- Use room-temperature eggs
They whip better and blend more smoothly, improving layer separation. - Don’t rush the cooling
Cutting too early collapses the custard layer. Cooling ensures clean slices. - Check oven accuracy
Too hot and the custard overcooks; too cool and it won’t set. An oven thermometer helps. - Citrus twist
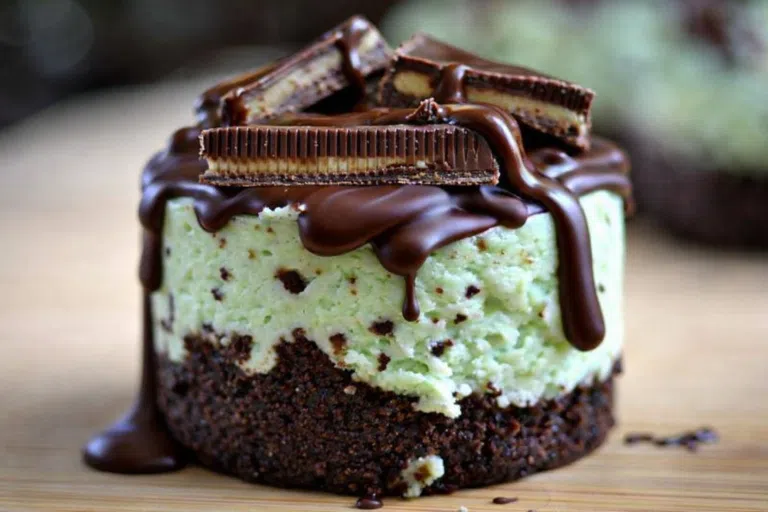
Add lemon or orange zest for brightness. It pairs beautifully with the custard. - Chocolate variation
Dust with cocoa powder or add a tablespoon of cocoa to the batter for a gentle chocolate flavor. - Seasonal spices
Nutmeg in winter, cardamom in spring — small additions make it feel new.
Common Myths & Mistakes
Myth 1: “If the batter is thin, the cake will fail”
Many beginners panic when they see how watery this batter looks. We’re conditioned to believe cake batter should be thick and spoonable, so a pourable mixture feels wrong.
People believe this myth because most traditional cakes rely on thicker batters for structure. Social media clips often skip over texture explanations, leaving home bakers confused and doubtful.
This belief is incorrect because the thin batter is exactly what allows the layers to form. The milk ratio creates separation during baking — heavier components sink while lighter ones rise.
The correct approach is to trust the consistency. As long as you measured accurately and folded gently, a thin batter is not a problem — it’s the whole point of the recipe.
Myth 2: “You must fully mix the egg whites into the batter”
Many people think streaks mean poor mixing. They assume everything must be perfectly smooth before baking.
This idea comes from traditional cake advice, where overmixing flour is the main concern, not egg whites.
In this recipe, fully blending the whites destroys the structure needed for the sponge layer. The streaks create pockets of air that rise during baking.
The correct approach is gentle folding with visible streaks remaining. Stop early, even if it feels unfinished. The oven will finish the job for you.
Myth 3: “If it jiggles, it’s underbaked”
A slight jiggle causes panic, especially for newer bakers. Many immediately return the cake to the oven.
This myth exists because we’re taught that cakes should be firm and springy when done.
Here, that jiggle is the custard layer — and it should move slightly when hot. Overbaking removes the creaminess and turns the center rubbery.
The correct approach is to check the top. If it’s set and lightly golden, the cake is done. The custard will firm up as it cools.
FAQ – Frequently Asked Questions
How long does magic custard cake last in the fridge?
This cake keeps beautifully in the refrigerator for up to 3 days when stored in an airtight container. In fact, the texture often improves after the first night as the custard layer fully settles. I usually cover the pan tightly or transfer slices to a sealed container. Avoid leaving it uncovered, as custard absorbs fridge odors easily and can dry out around the edges.
Can I freeze magic custard cake without ruining the layers?
Freezing is possible, but it does slightly change the custard texture. The sponge layer freezes well, but the custard may become a bit softer once thawed. If you do freeze it, wrap individual slices tightly in plastic wrap and thaw slowly in the refrigerator. I recommend freezing only if necessary — fresh or chilled is best.
Why didn’t my cake separate into layers?
Layer issues usually come from one of three things: milk temperature, overmixing, or oven heat. Cold milk prevents proper separation, while overmixing removes the air needed for layering. An oven that runs too hot can cook everything too quickly. Use lukewarm milk, fold gently, and bake low and slow for best results.
Can I substitute plant-based milk?
You can, but results vary. Full-fat oat milk or soy milk works better than almond milk, which is too thin. The fat content helps create the custard layer. Expect slightly softer layers and a less rich flavor. Always use unsweetened varieties to control sweetness.
Why is my custard layer too runny even after chilling?
This usually means the cake was underbaked or sliced too early. Even though it sets as it cools, it still needs enough oven time to thicken properly. Next time, bake until the top is fully set and allow a full chill before cutting. Patience here makes all the difference.
A Final Thought from My Kitchen
This cake reminds me that good things happen when we slow down. It’s not flashy. It doesn’t demand attention. It just quietly becomes something wonderful — much like cooking for the people we love.
If you make this, I hope it brings a little calm to your kitchen, too.
PrintMagic 3-Layer Custard Cake (A Calm Kitchen Favorite)
- Total Time: 1 hour 15 minutes (plus chilling)
- Diet: Vegetarian
Description
A single batter transforms into three beautiful layers — sponge, custard, and base — with gentle baking and patience.
Ingredients
-
4 large eggs, separated
-
3/4 cup granulated sugar
-
1/2 cup unsalted butter, melted and cooled
-
3/4 cup all-purpose flour
-
2 cups milk, lukewarm
-
1 tablespoon vanilla extract
-
1/4 teaspoon salt
Instructions
-
Preheat oven to 325°F (160°C) and line an 8×8-inch pan with parchment.
-
Beat egg whites to soft peaks and set aside.
-
Beat yolks with sugar until pale; mix in butter and vanilla.
-
Add flour and salt, then slowly whisk in milk.
-
Gently fold in egg whites, leaving streaks.
-
Pour batter into pan and bake 50–60 minutes until lightly golden.
-
Cool completely, then chill before slicing.
Notes
Chill at least 2 hours for clean slices
Store covered in fridge up to 3 days
Best served lightly chilled
- Prep Time: 20 minutes
- Cook Time: 55 minutes
- Category: Dessert
- Method: Baking
- Cuisine: European
Nutrition
- Serving Size: 9
- Calories: 220 per serving
- Sugar: 18g
- Fat: 10g