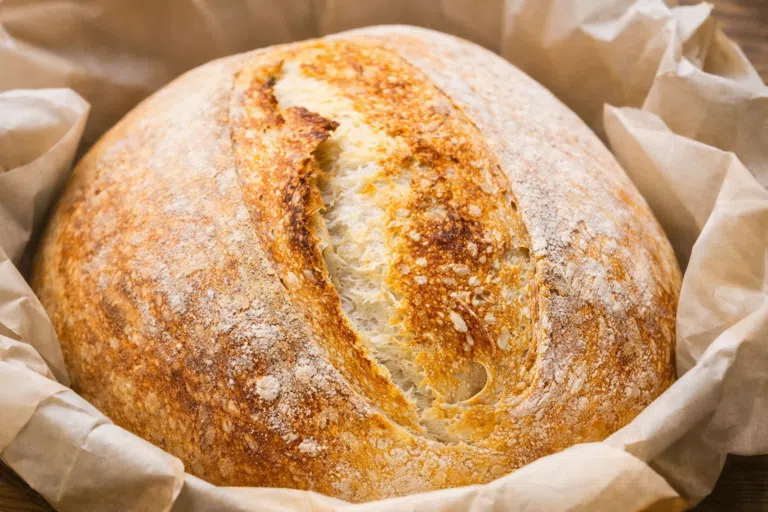
Homemade Cruffins (A Patient Baker’s Weekend Treat)
Hi, I’m Helen — and if you’ve been around Cookliva for a while, you know I’m not one for rushing recipes. I believe some things are meant to take time, especially when butter, yeast, and a quiet afternoon are involved.
These homemade cruffins came into our lives on a slow Saturday — the kind where my husband Mark had the kids, Lily and Owen, building Lego towers at the kitchen table while I claimed the counter, my rolling pin, and several sticks of butter. The house smelled like warm milk and yeast by mid-morning, and by lunchtime, the oven was doing that magical thing where everyone suddenly wanders into the kitchen asking, “What is that smell?”
Cruffins are not a casual bake. They are a project. But they’re also deeply satisfying — flaky, layered, cinnamon-sugar kissed pastries that feel like something you’d splurge on at a bakery… yet somehow pulled from your own oven.
If you’ve ever wanted to try laminated dough without committing to classic croissants, this is a wonderful place to begin.
Why You’ll Love This Recipe
There are many reasons these cruffins are worth an afternoon in the kitchen, but here are the ones that mattered most in our house:
They feel special without feeling fussy
Yes, there are folds and chilling steps — but none of them are difficult. This recipe is about patience, not perfection.
That flaky-meets-soft texture
Cruffins give you crisp, buttery layers on the outside and a soft, pull-apart center that feels like a cinnamon roll and croissant had the best possible child.
They make ordinary mornings memorable
We ate ours warm, fingers sticky with cinnamon sugar, standing around the counter. Lily declared them “better than muffins,” which is high praise in our home.
Endlessly customizable
Plain is lovely. Filled is indulgent. Sweet, cozy, bakery-style — these adapt beautifully to whatever mood you’re baking in.

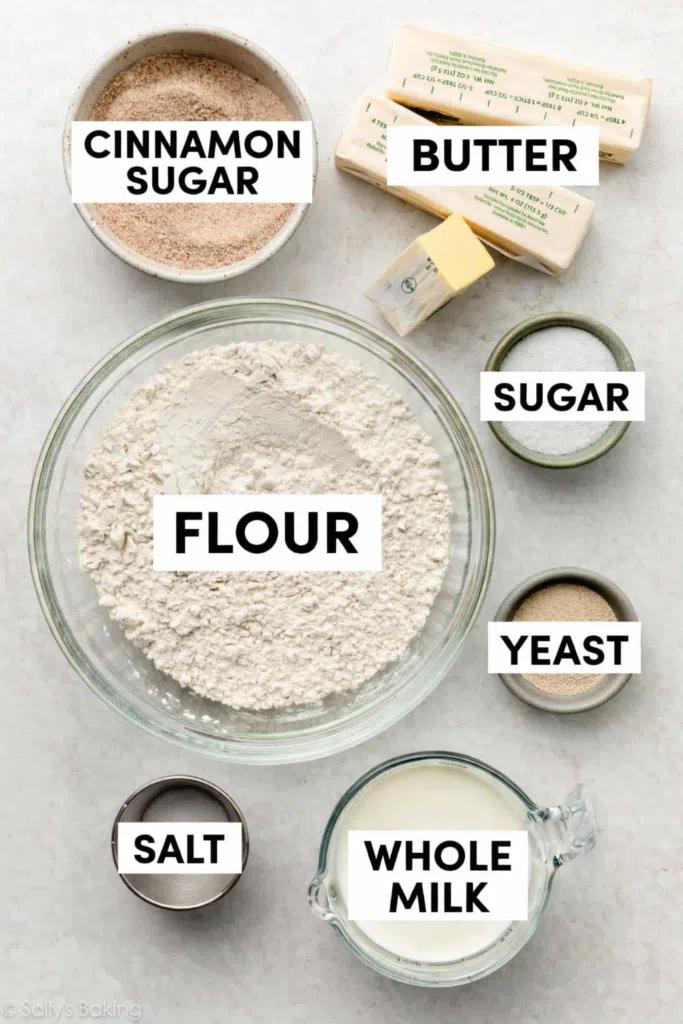
Ingredients
Let’s talk about why each ingredient matters, because understanding your dough makes the process far less intimidating.
For the Dough
- Whole milk – Adds richness and softness. Warm, but not hot, is key for happy yeast.
- Yeast – This gives the dough lift and lightness. Either instant or active dry works.
- Granulated sugar – Feeds the yeast and lightly sweetens the dough.
- Butter – A small amount goes into the dough itself for tenderness.
- All-purpose flour – Strong enough to hold layers, gentle enough to stay tender.
- Salt – Essential for balance and flavor.
For Laminating
- Butter (lots of it) – This is where the magic happens. I always reach for European-style butter when I can. It’s softer, richer, and easier to roll.
Cinnamon-Sugar Coating
- Granulated sugar
- Ground cinnamon
Optional Fillings
- Nutella
- Jam
- Lemon curd
- Pastry cream
Instructions
This is a recipe you want to read through once before starting. Then take it step by step. There’s no race here.
1. Make the Dough
Warm the milk until it feels like bath water. Stir in the yeast and sugar and let it sit until foamy — this tells you the yeast is awake and ready.
Mix in the butter, salt, and flour until a soft dough forms. It should feel slightly tacky but not sticky. Knead until smooth and elastic.
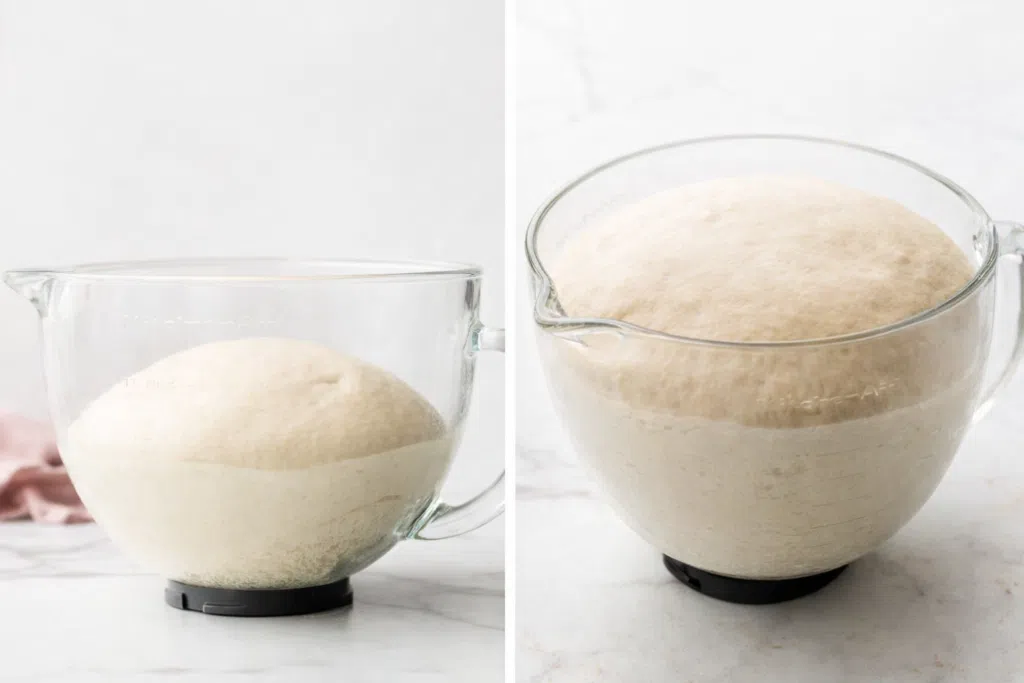
2. First Rise
Place the dough in a lightly greased bowl, cover, and let it rise until nearly doubled. This usually takes about 2 hours in a warm kitchen.
When ready, gently press the air out — no need to punch aggressively. Think calm, not force.
3. Chill Before Laminating
Roll the dough into a rectangle, cover, and refrigerate briefly. Cold dough is easier to laminate and keeps the butter where it belongs — between the layers.
4. Lamination (The Heart of the Recipe)
This is where patience shines.
Beat softened (but still cool) butter with a little flour to stabilize it. Spread it over part of the dough, fold like a letter, roll gently, and repeat.
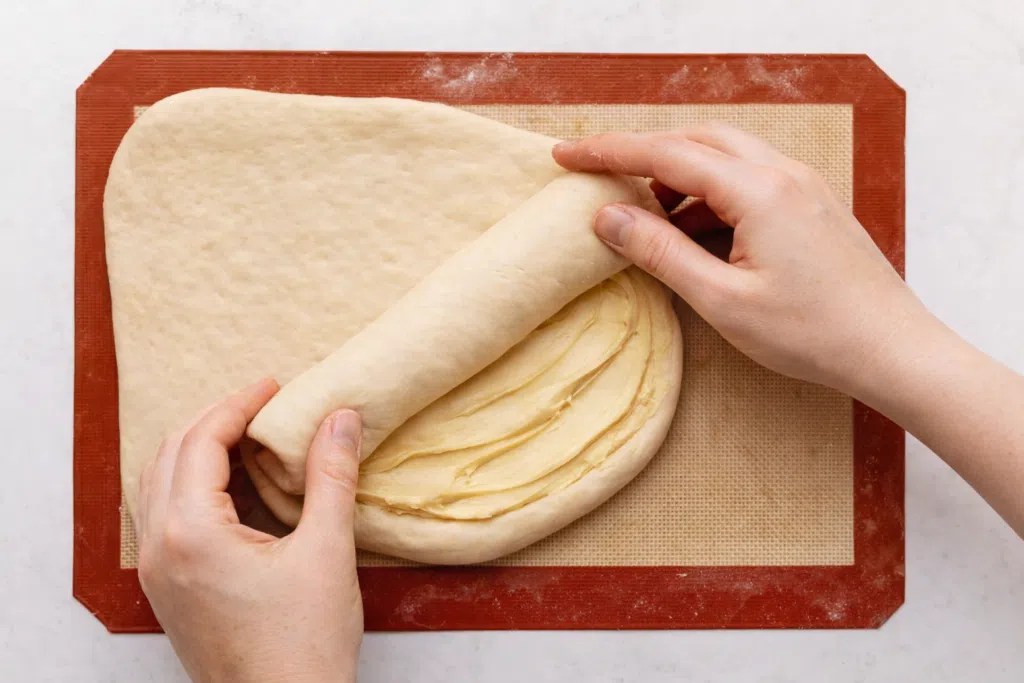
You’ll do three rounds of rolling and folding, chilling briefly between each. This creates dozens of thin layers that puff beautifully in the oven.
If the dough resists or shrinks back, let it rest. Gluten just needs a moment to relax.
5. Shaping the Cruffins
Once laminated, divide the dough into portions. Roll each into a rectangle, sprinkle generously with cinnamon sugar, and cut into strips.
Layer a few strips together and roll them into a loose spiral — like a cinnamon roll with attitude. Place each spiral into a greased muffin cup.
Don’t worry if they look imperfect. They always transform in the oven.
6. Final Rise
Cover lightly and let the cruffins rise until puffy. This gives them that bakery-style lift.
7. Bake
Bake until deeply golden and fragrant. Your kitchen will smell like butter and cinnamon — fair warning.
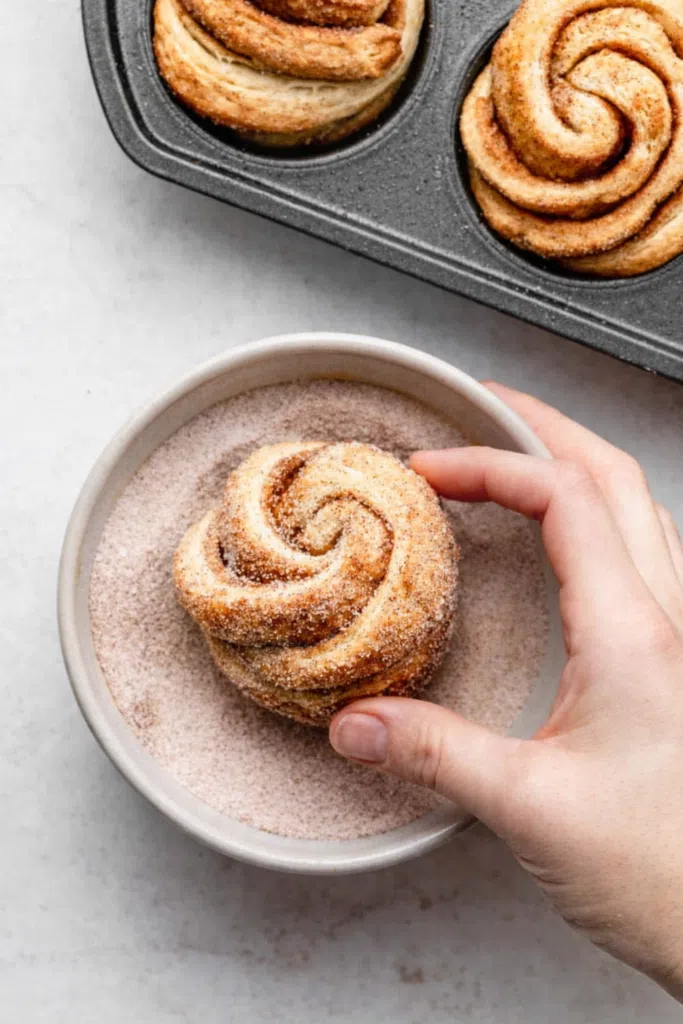
8. Cinnamon-Sugar Finish
While still warm, roll each cruffin in cinnamon sugar. This step is non-negotiable in our house.
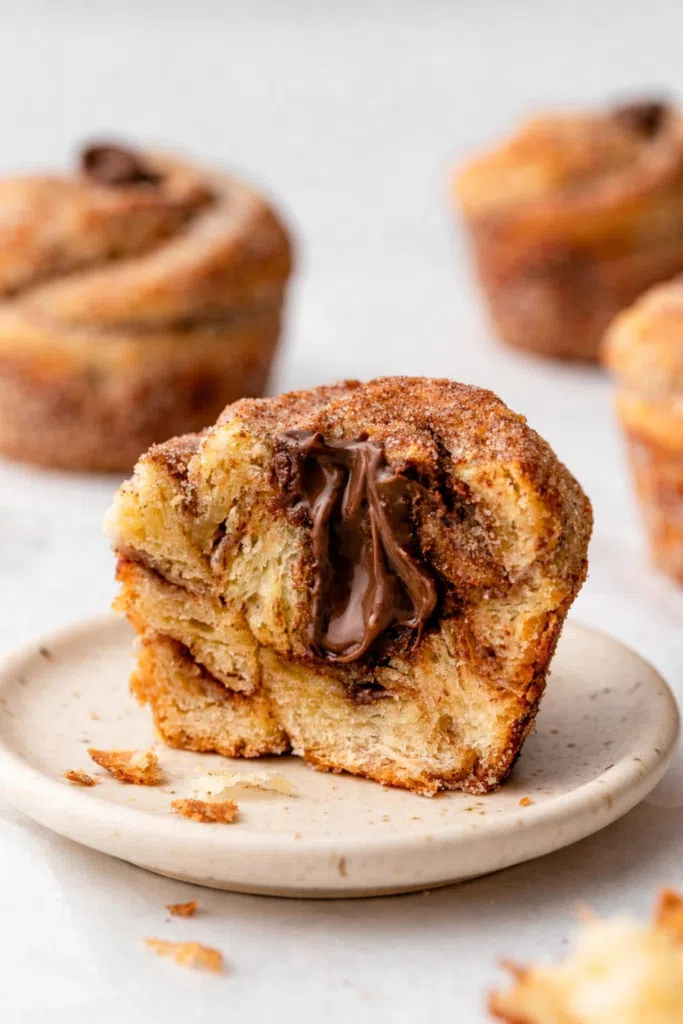
9. Optional Filling
If filling, poke a small hole and pipe gently until the center is just full. Nutella was Mark’s favorite. Lemon curd was mine.
Variations
Once you’ve made these once, it’s hard not to imagine new versions.
Chocolate Lover’s Cruffins
Fill with chocolate ganache or Nutella and dust lightly with powdered sugar.
Fruity & Bright
Use raspberry jam or lemon curd for contrast against the buttery layers.
Extra Cozy
Add a pinch of nutmeg or cardamom to the cinnamon sugar.
Simple Bakery Style
Skip filling altogether and enjoy them warm with coffee — honestly, they don’t need more.

Homemade Cruffins (A Patient Baker’s Weekend Treat)
- Total Time: 5h45min
- Diet: Vegetarian
Description
Made with buttery, flaky croissant dough and swirled with a generous cinnamon-sugar filling, these homemade cruffins bring together two classic pastries in one irresistible bake. This cruffin recipe is designed specifically for a standard muffin pan, making it easy to recreate bakery-style cruffins at home without special equipment. While professional bakeries often use deeper popover pans for taller cruffins, this approachable version delivers the same rich flavor, crisp layers, and soft center using tools every home baker already has.
Ingredients
Dough
-
1 cup (240 ml) whole milk, warmed to 110°F (43°C)
-
2¼ teaspoons (7 g) instant or active dry yeast (1 packet)
-
3 tablespoons (38 g) granulated sugar
-
3 tablespoons (43 g) butter, softened (salted or unsalted), cut into pieces
-
3 cups (375 g) all-purpose flour, spooned and leveled (plus more if needed)
-
1¼ teaspoons salt
Lamination
-
1 cup (226 g / 16 tablespoons) salted butter, slightly softened
-
1 tablespoon all-purpose flour
Cinnamon Sugar Filling
-
¾ cup (150 g) granulated sugar
-
1 tablespoon ground cinnamon
Optional Fillings
-
6 tablespoons Nutella
-
Jam
-
Lemon curd
-
Pastry cream
Instructions
📝 Preliminary Notes (Read Before You Start)
Before you begin, take a moment to review the step-by-step photos and read through the entire recipe, including the notes. This dough relies on precise timing and temperature, especially during the lamination stages.
✔️ Make sure you have enough space in your refrigerator to chill a baking sheet multiple times (steps 6–10).
✔️ Avoid extending chilling times—doing so can cause the dough to over-expand and become difficult to roll.
✔️ Work calmly and deliberately. Laminated dough rewards patience.
🥛 Prepare the Dough
In the bowl of a stand mixer fitted with a dough hook, whisk together the warm milk, yeast, and granulated sugar. Cover the bowl loosely and let the mixture sit for about 5 minutes, until a foamy layer forms on top. This indicates the yeast is active.
No stand mixer?
You can do this step in a large mixing bowl instead. In the next step, mix everything together using a wooden spoon or silicone spatula. While a hand mixer technically works, the sticky dough often clings to the beaters, making manual mixing the better option.
Add the butter, 2 cups (250 g) of flour, and the salt. Beat on medium speed for 2 minutes, stopping to scrape down the bowl as needed. Some butter pieces may remain visible at this stage—this is perfectly fine.
Add the remaining 1 cup (125 g) of flour and beat on low speed until the dough comes together and begins pulling away from the sides of the bowl. The dough should be soft and slightly tacky, but not overly sticky.
If it feels too wet, beat in up to 2 additional tablespoons of flour, but avoid adding more than necessary to prevent a dry dough.
🤲 Knead the Dough
Continue kneading the dough in the mixer for 5 full minutes, or transfer it to a lightly floured surface and knead by hand for the same amount of time.
If the dough becomes sticky while kneading, sprinkle 1 teaspoon of flour at a time onto the dough or work surface. The goal is a soft, elastic dough—not a dry one.
To test readiness:
-
Finger test: Gently poke the dough. If it slowly springs back, it’s ready.
-
Windowpane test: Stretch a small piece of dough until thin. If light passes through without tearing, the gluten is well developed.
⏳ First Rise
Lightly grease a large bowl with oil or nonstick spray. Place the dough inside, turning it to coat all sides. Cover the bowl tightly and let the dough rise in a warm environment for about 2 hours, or until nearly doubled in size.
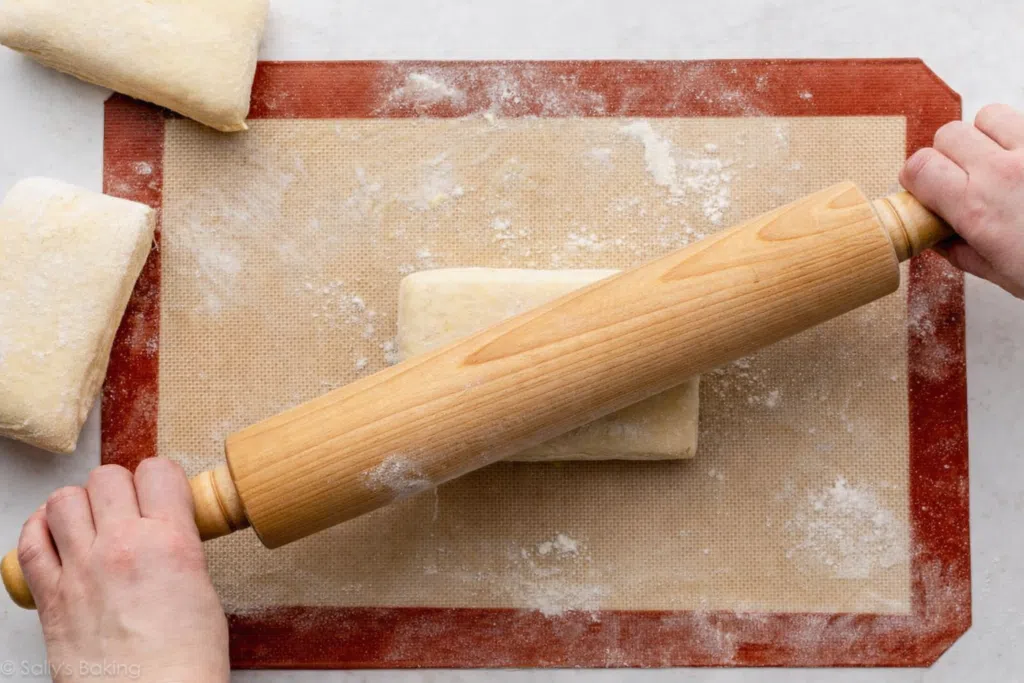
📏 Flatten & Chill the Dough
Gently punch down the dough to release air. Transfer it to a lightly floured silicone baking mat or parchment-lined baking sheet.
Using floured hands or a rolling pin, carefully stretch the dough into a 10×14-inch (25×36 cm) rectangle, being careful not to tear it. Lightly cover and refrigerate the dough for 20 minutes only—do not extend this rest time.
🧈 Prepare for Lamination
While the dough chills, prepare the butter. It should be cool but pliable, ideally between 60–64°F (15–18°C).
Beat the butter and 1 tablespoon flour together using a hand mixer or paddle attachment until completely smooth and combined.
Before laminating, keep these tips in mind:
-
Keep extra flour nearby to dust your surface and rolling pin as needed. If butter becomes exposed, sprinkle it lightly with flour.
-
If the dough resists rolling, flip it over. If it still resists, let it rest for 5 minutes to relax the gluten.
-
Do not extend refrigeration times—this makes rolling much harder and compromises the layers.
🔁 First Lamination
Remove the dough from the refrigerator. With the long edge facing you, spread the butter evenly down the center third of the dough.
Fold one long side over the butter, then fold the opposite side over that, like folding a business letter. Pinch the short ends to seal the butter inside.
Rotate the dough so the long edge is horizontal. Lightly flour the surface and roll out to a 9×12-inch (23×30 cm) rectangle. Fold again like a business letter, cover, return to the baking sheet, and refrigerate for 20 minutes.
🔁 Second Lamination
Remove the dough from the refrigerator and rotate it so the long edge faces you. Roll out to 9×12 inches, fold like a business letter, rotate, roll again to 9×12 inches, and fold once more.
Cover and refrigerate for 20 minutes.
🔁 Third Lamination
Repeat the exact process from the second lamination: roll, fold, rotate, roll again, fold again. Cover and refrigerate for a final 20 minutes.
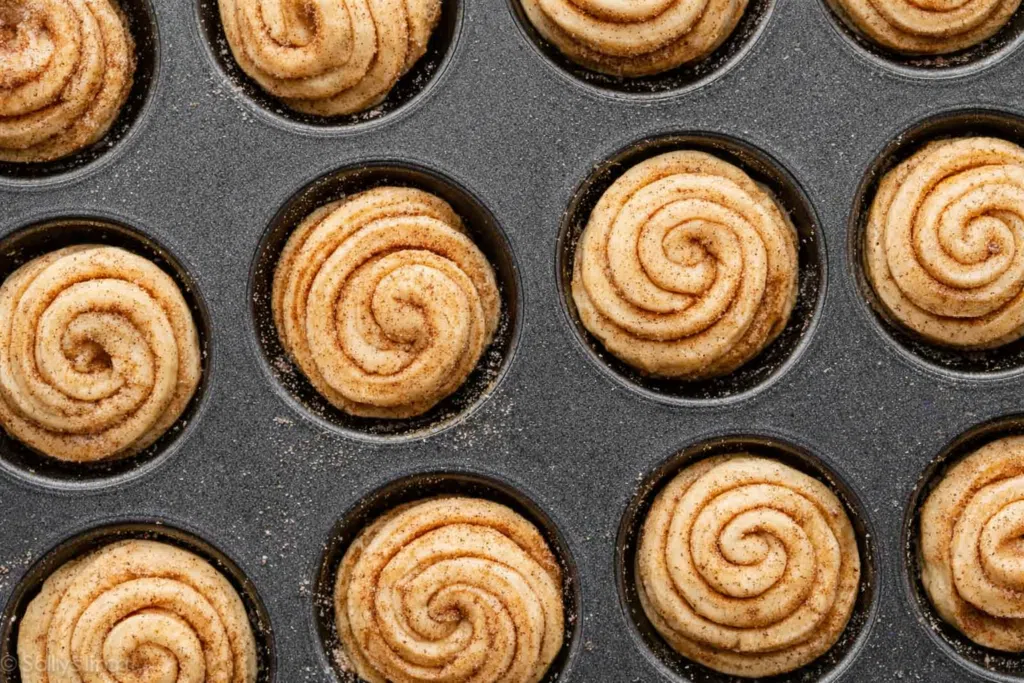
🌀 Shape & Fill the Cruffins
Grease a standard 12-cup muffin pan. In a small bowl, mix together the sugar and cinnamon.
Remove the chilled dough and cut it into 3 equal portions using a bench scraper or knife.
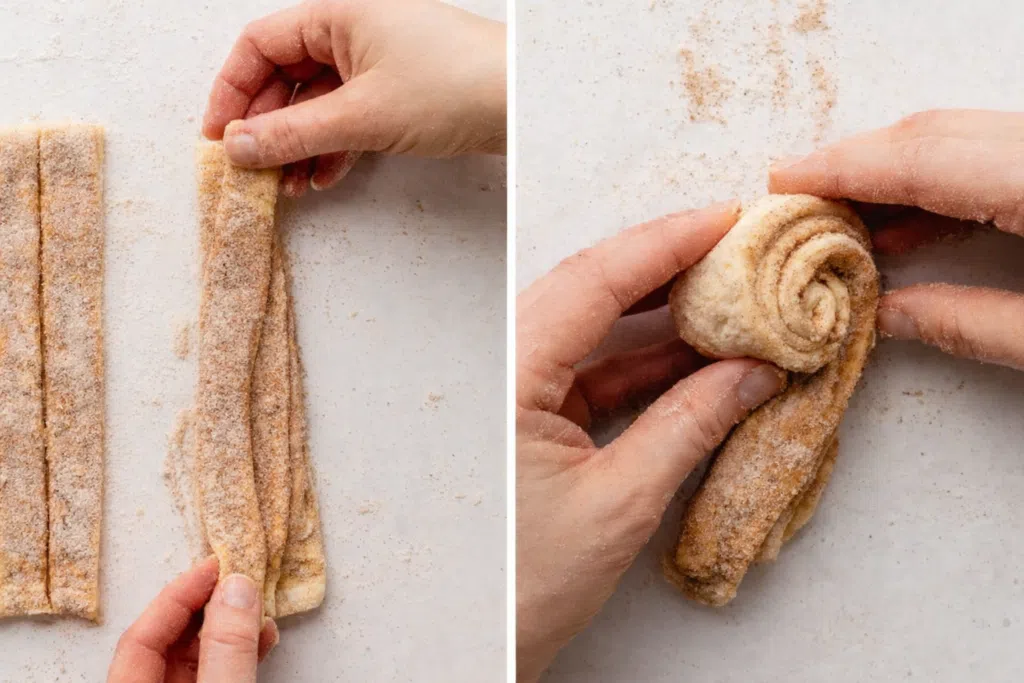
Working with one portion at a time on a lightly floured surface, roll it into an 8×12-inch rectangle. If the dough shrinks back, let it rest for 5 minutes, then continue rolling.
Sprinkle evenly with 2 tablespoons cinnamon sugar, pressing it gently into the dough. Cut into 12 one-inch strips. Stack 3 strips together, roll them into a tight spiral, tuck the ends underneath, and place into a muffin cup.
Repeat with remaining dough to make 12 cruffins total.
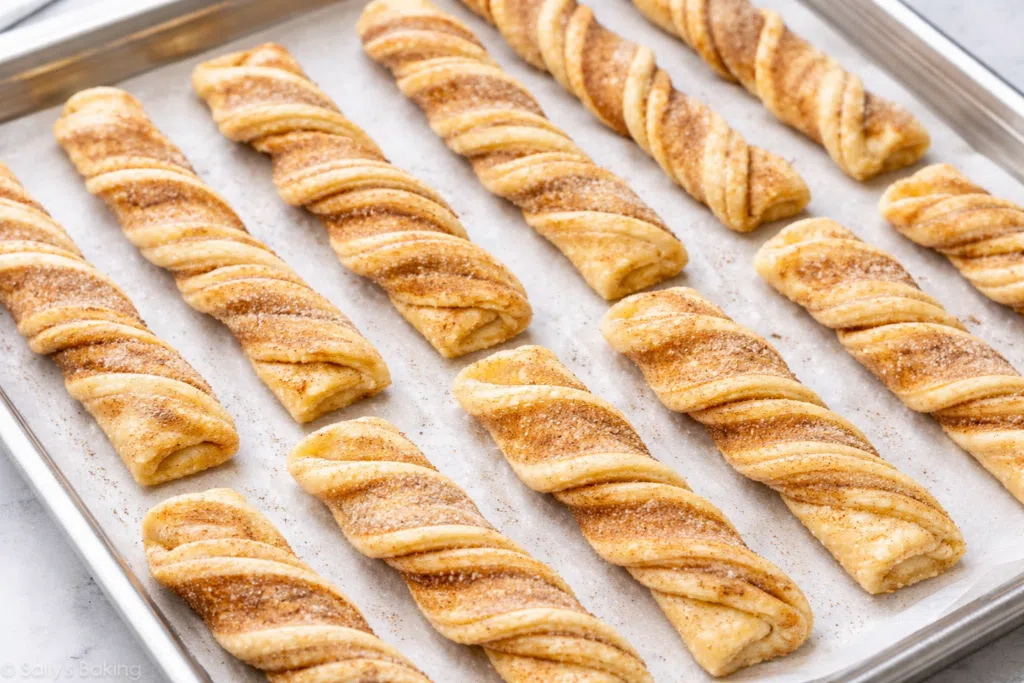
Cover lightly and let rise for 1 hour, until visibly puffy.
🔥 Bake
Preheat the oven to 350°F (177°C).
Bake cruffins for 25–28 minutes, until golden and the internal temperature reaches 200°F (93°C).
Let cool slightly in the pan set on a wire rack.
✨ Coat & Fill (Optional)
Once cool enough to handle, roll each cruffin in the remaining cinnamon sugar.
To fill, transfer your desired filling to a piping bag fitted with a long, narrow tip. Insert the tip about ¾ of the way down into each cruffin and gently squeeze to fill.
🏠 Storage
Store leftover cruffins covered at room temperature for up to 3 days.
Notes
Dough can be prepared and shaped the day before baking.
Store at room temperature up to 3 days.
Freeze baked cruffins up to 3 months.
- Prep Time: 4h45min
- Cook Time: 25 min
- Category: Breakfast & Brunch
- Cuisine: Bakery-Style
Nutrition
- Serving Size: 12
- Calories: 360
FAQ
Are cruffins hard to make?
They’re detailed, not difficult. If you can roll dough and follow steps, you can make cruffins.
Can I make them ahead?
Yes. You can refrigerate the shaped cruffins overnight and bake the next morning.
Why does butter leak sometimes?
Usually the dough or butter got too warm. Chill briefly and continue — it’s fixable.
Can they be frozen?
Absolutely. Bake, cool, wrap individually, and freeze. Warm gently before serving.
These homemade cruffins reminded me why I love slow baking. They required attention, yes — but they also gave back so much: warmth, laughter, and that quiet satisfaction of pulling something beautiful from the oven.
If you try them, don’t rush. Put on music. Let the kids peek over the counter. Let butter and patience do what they do best.