Homemade Artisan Bread (Calm, Crusty, and Perfect for Everyday Life)
Hi, I’m Helen Whitaker — welcome to Cookliva.
If there’s one smell that instantly slows my whole day down, it’s bread baking in the oven. The kind of bread that crackles softly as it cools on the counter. The kind that makes my husband, Mark, wander into the kitchen “just to check something,” and my kids, Emma and Noah, ask every five minutes when it’ll be ready.
This homemade artisan bread has become one of those grounding recipes in our home. I make it on weekends when the house is quiet in the morning, or sometimes on a Sunday afternoon when I want the week ahead to feel a little softer. It’s not fancy. It doesn’t require special equipment or advanced skills. It’s simply honest bread — crusty on the outside, soft and airy inside, and made at a pace that feels human.
I know bread baking can feel intimidating. For years, I avoided it because I thought I needed a stand mixer, years of practice, or some kind of baking intuition I didn’t have. What I’ve learned — and what I want to share with you — is that good bread is about patience, not perfection. This recipe is forgiving, flexible, and made for real kitchens with real schedules.
Why You’ll Love This Recipe
This artisan bread is one of those recipes that quietly earns a permanent place in your routine.
First, it’s incredibly simple. There’s no kneading, no complicated shaping, and no stress about doing things “just right.” You mix, you wait, and you bake. That’s it.
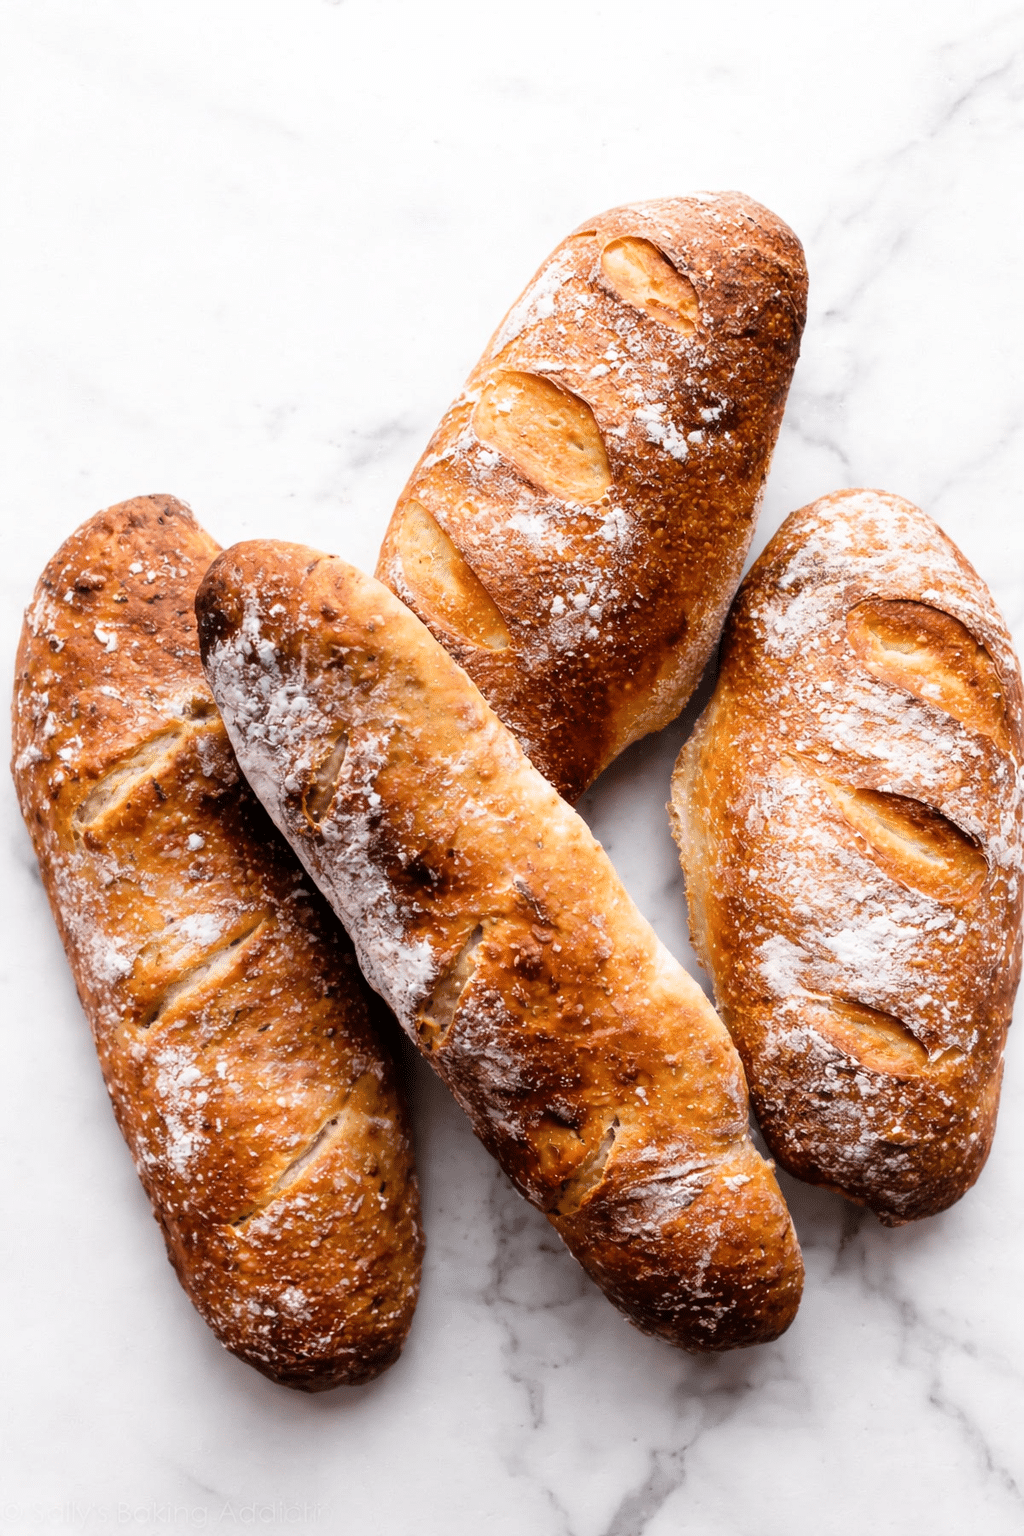
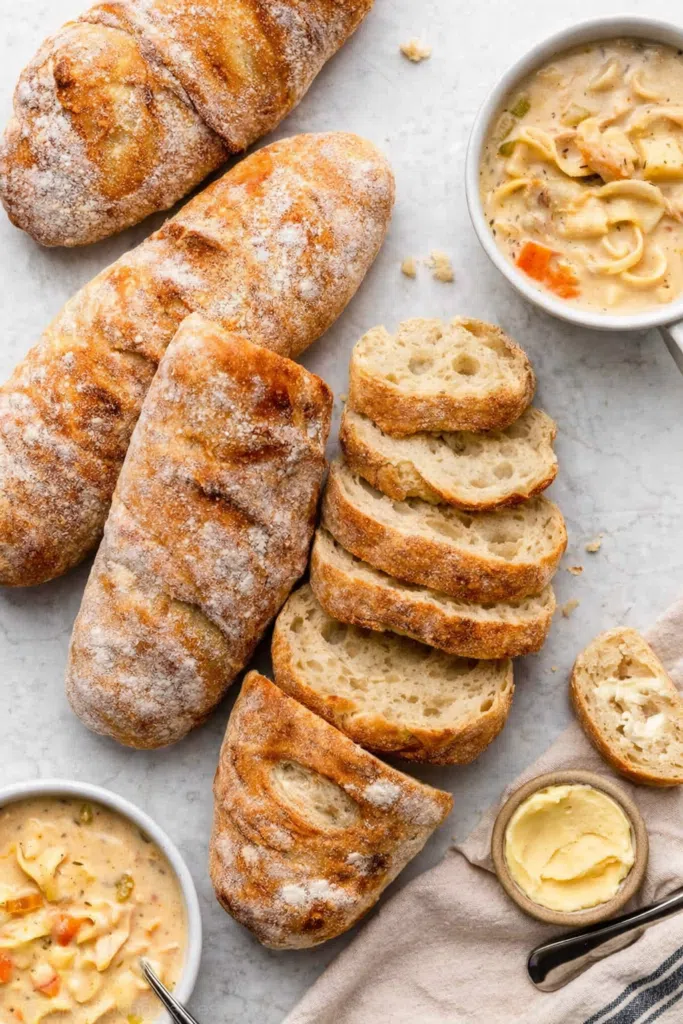
Second, the texture is everything you want from bakery-style bread. The crust turns deeply golden and crisp, while the inside stays soft, chewy, and full of irregular air pockets — perfect for butter, soup, sandwiches, or tearing off warm chunks straight from the loaf (which, yes, happens every time here).
Third, it fits into real life. I can mix the dough in the evening after dinner, let it rise overnight while we sleep, and bake it the next day when it’s convenient. Or I can start it early in the morning and bake it by dinner. The flexibility makes it realistic, even on busy weeks.
And finally, it brings people together. There’s something about homemade bread that makes a meal feel complete. Emma loves dipping it into olive oil, Noah insists it’s best with honey, and Mark swears it doesn’t need anything at all.

The Origin of This Recipe
My love for simple bread goes back to my grandmother’s kitchen. She didn’t measure much, didn’t rush anything, and never worried about perfect loaves. She believed dough needed time and a little trust.
This recipe is inspired by that mindset — old-world bread baking adapted for modern kitchens. The idea is simple: use time instead of effort. A long, slow rise allows the dough to develop flavor and structure without kneading. It’s the kind of bread people have been making for generations, long before electric mixers and complicated techniques.
I’ve made this loaf countless times now, adjusting little details to make it as reliable and approachable as possible for home cooks. It’s the bread I recommend when someone tells me, “I’ve never baked bread before.”

Ingredients
One of the reasons this recipe works so well is because the ingredient list is refreshingly short. Each ingredient plays an important role, and understanding them helps you bake with confidence.
All-Purpose Flour
This is the backbone of the bread. All-purpose flour provides enough protein to create structure while keeping the crumb tender. You don’t need bread flour for this recipe — simplicity is part of the charm.
Warm Water
Water activates the yeast and hydrates the flour. Warm means just slightly warm to the touch, not hot. If the water feels too hot on your finger, it’s too hot for the yeast.
Yeast
Yeast is what gives the bread its rise and airy texture. A small amount goes a long way when given enough time. This slow fermentation also develops flavor naturally.
Salt
Salt adds flavor and controls yeast activity. Without it, bread tastes flat and can rise too quickly, leading to weak structure.
That’s it. Four ingredients. No sugar, no oil, no extras required.
Instructions
Step 1: Mix the Dough
In a large bowl, combine the flour, yeast, and salt. Stir them together so the yeast and salt are evenly distributed. This prevents uneven rising later.
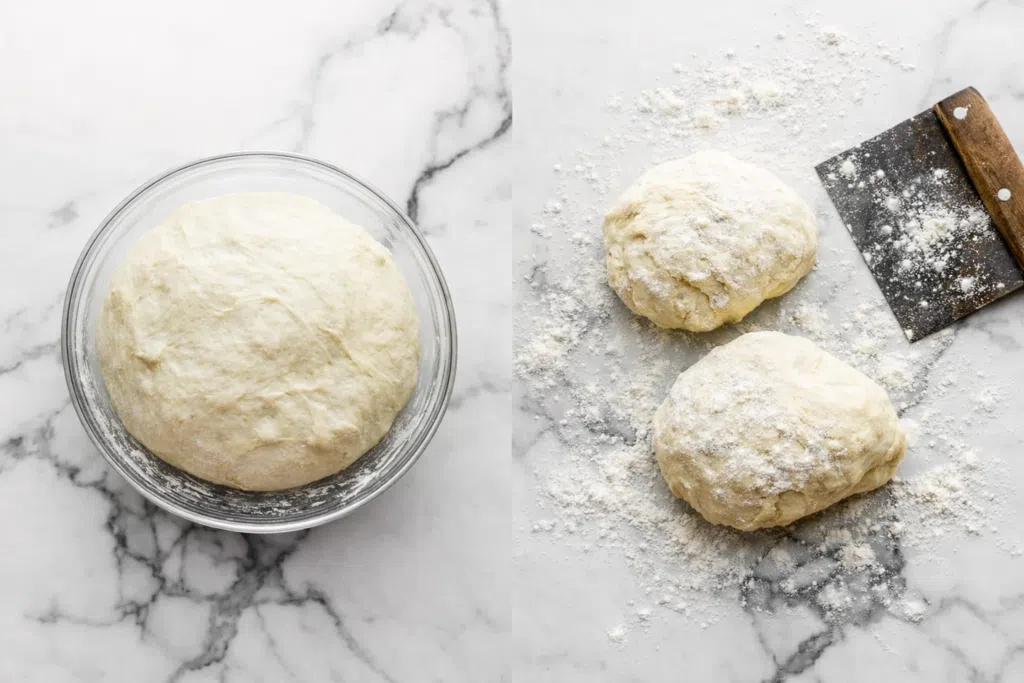
Pour in the warm water and stir with a wooden spoon or spatula until a shaggy dough forms. It will look messy and sticky — that’s exactly what you want. Don’t try to smooth it out or add more flour.
Tip: If your dough looks dry with visible flour pockets, add a tablespoon of water at a time until everything is hydrated.
Step 2: Let It Rise (Slowly)
Cover the bowl loosely with plastic wrap or a clean kitchen towel. Let the dough rise at room temperature for 12–18 hours. Yes, it’s a long time — and yes, it’s worth it.
During this time, the dough will expand, bubble, and develop flavor. You’ll know it’s ready when the surface is dotted with bubbles and it looks jiggly when you tilt the bowl.
Common mistake: Rushing this rise. A shorter rise won’t ruin the bread, but it will affect flavor and texture.
Step 3: Shape Gently
Turn the dough out onto a lightly floured surface. Use floured hands to gently fold the dough into a round shape. Don’t knead it. You’re just giving it some structure.
If the dough sticks to your hands, lightly flour them — not the dough itself.
Step 4: Preheat the Oven
Place a Dutch oven (with the lid on) into your oven and preheat to 450°F (232°C). Preheating the pot is essential for creating steam, which gives the bread its crust.
Let the pot heat for at least 30 minutes.
Step 5: Bake
Carefully remove the hot Dutch oven. Gently place the dough inside (you can use parchment paper if you prefer). Cover with the lid and bake for 30 minutes.
Then remove the lid and bake for another 10–15 minutes until the crust is deeply golden.
Visual cue: The bread should sound hollow when tapped on the bottom.
Step 6: Cool (This Matters)
Transfer the bread to a wire rack and let it cool for at least 30 minutes before slicing. Cutting too soon releases steam and can make the inside gummy.
This is the hardest step — trust me.
Tips & Flavor Variations
- Let Time Do the Work
A longer rise creates better flavor and texture because yeast has more time to develop natural complexity. - Use a Kitchen Scale if You Can
Weighing flour prevents adding too much, which can make bread dense. - Add Steam If You Don’t Have a Dutch Oven
Place a metal pan of hot water on the oven rack below the bread to create steam. - Whole Wheat Variation
Replace up to 25% of the flour with whole wheat flour for a nuttier flavor without sacrificing softness. - Herb Bread
Fold in rosemary, thyme, or garlic powder before the rise for a savory loaf. - Seeded Crust
Sprinkle sesame or sunflower seeds on top before baking for extra texture.
Common Myths & Mistakes
Myth 1: “Bread Dough Shouldn’t Be Sticky”
People believe this because they’re taught to knead smooth dough. Sticky dough is essential for an open, airy crumb in artisan bread.
Correct approach: Embrace the stickiness and use lightly floured hands.
Myth 2: “You Need Special Equipment”
Bread was made long before stand mixers existed.
Correct approach: A bowl, spoon, and oven are enough.
Myth 3: “If It’s Not Perfect, It Failed”
Uneven holes and rustic shapes are signs of handmade bread.
Correct approach: Focus on flavor and texture, not appearance.
FAQ
Can I make this dough ahead of time?
Yes. You can refrigerate the dough after the first rise for up to 3 days.
How do I store the bread?
Store loosely wrapped at room temperature for up to 2 days. Freeze slices for longer storage.
Can I freeze the whole loaf?
Absolutely. Cool completely, wrap tightly, and freeze for up to 3 months.
Why is my bread dense?
Usually from too much flour or not enough rise time.
Can I bake this without a Dutch oven?
Yes. Use a baking stone or sheet and add steam to the oven.


