Gluten-Free Bread Recipe That’s Soft, Easy, and Always Reliable
Baking a gluten-free bread recipe used to intimidate me. The first few loaves I made without wheat left me staring at the oven door, wondering if the dough would rise—or collapse into a dense brick. After many trials and small adjustments, I finally developed a loaf that checks all the boxes: soft texture, light crumb, and real bread flavor.
At Let’s Cook Meals, we believe gluten-free baking shouldn’t feel limiting. With the right ingredients and technique, gluten-free bread can be just as comforting and satisfying as traditional bread.
In this article, you’ll learn what gluten-free bread really is, how and why it works, a dependable recipe, expert tips, and how to avoid the most common mistakes.
WHAT IS A GLUTEN-FREE BREAD RECIPE?
A gluten-free bread recipe is made without gluten-containing grains such as wheat, barley, or rye. Instead, it uses gluten-free flours like rice flour, sorghum flour, almond flour, millet flour, or certified gluten-free oats.
Since gluten normally provides structure and elasticity in bread, gluten-free recipes rely on binding ingredients such as psyllium husk, xanthan gum, or chia seeds. These help trap air, support rise, and create a soft, cohesive crumb.

With the correct balance of moisture, binders, and leavening, gluten-free bread can be moist, tender, and flavorful, making it suitable for people with celiac disease, gluten intolerance, or anyone choosing to avoid gluten.
DOES GLUTEN-FREE BREAD RECIPE REALLY WORK FOR GLUTEN-FREE LIVING?
Light Scientific Context
Yes. A properly prepared gluten-free bread recipe can be a dependable staple for gluten-free diets. Research cited by the National Institutes of Health (NIH) confirms that eliminating gluten is essential for individuals with celiac disease and beneficial for those with non-celiac gluten sensitivity.
Using certified gluten-free ingredients is crucial to prevent accidental gluten exposure.
[1] Source: NIH – https://www.ncbi.nlm.nih.gov/pmc/articles/PMC9029860/
Digestive & Dietary Benefits
Gluten-free bread can help minimize symptoms such as bloating, fatigue, joint discomfort, and digestive irritation in sensitive individuals. Many gluten-free whole-grain flours—like millet or teff—also provide fiber and important micronutrients.
Some homemade versions are free from dairy or eggs, making them gentler on digestion.
Cost, Simplicity & Flavor Advantages
Store-bought gluten-free bread is often expensive and inconsistent in quality. Homemade gluten-free bread:
- Costs less per loaf
- Offers full control over ingredients
- Allows customization of flavor and texture
Flavor profiles vary depending on the flour blend, often delivering subtle nutty or earthy notes not found in packaged bread.
Emotional & Lifestyle Appeal
Baking gluten-free bread at home can be empowering. Knowing exactly what goes into your food builds confidence and creates a sense of normalcy for individuals and families managing dietary restrictions.
INGREDIENTS FOR GLUTEN FREE BREAD RECIPE
Full table of ingredients
Here’s a basic yet reliable gluten free bread recipe that yields a soft, sandwich-style loaf:
| Ingredient | Amount |
|---|---|
| Gluten-free flour blend | 3 cups (360 g) |
| Warm water (110°F / 43°C) | 1 ½ cups (355 ml) |
| Active dry yeast | 1 packet (2 ¼ tsp) |
| Sugar or honey | 1 tbsp |
| Olive oil | ¼ cup |
| Apple cider vinegar | 1 tsp |
| Salt | 1 tsp |
| Psyllium husk powder | 1 tbsp |
| Eggs (or flax eggs) | 2 |
Note: Be sure your gluten-free flour blend includes a binder like xanthan gum. If not, add 1 tsp separately.
Substitutions (Vegan, Low-Carb, & More)
- Vegan: Use flax eggs (1 tbsp ground flax + 2.5 tbsp water per egg)
- Low-carb: Replace flour with almond and coconut flour (expect a denser loaf)
- No yeast: Use baking soda with lemon juice for a quick-bread version
- No psyllium husk: Use soaked chia seeds or ground flax
- Dairy-free: Naturally dairy-free—always verify your flour blend
Easy Gluten Free Bread
Equipment
- Mixing bowl
- Measuring cups and spoons
- Whisk or stand mixer
- Spatula
- 9×5-inch loaf pan
Instructions
- Activate the yeast: Combine warm water, sugar (or honey), and yeast. Let sit 5–10 minutes until foamy.
- Mix dry ingredients: Whisk together gluten-free flour, psyllium husk powder, and salt.
- Combine wet ingredients: In a separate bowl, whisk eggs, olive oil, and apple cider vinegar. Add yeast mixture.
- Form the dough: Mix wet and dry ingredients thoroughly. The dough will be thick and sticky, similar to batter.
- Let the dough rise: Cover and let rise in a warm place for 45–60 minutes until nearly doubled.
- Preheat and prepare: Preheat oven to 375°F (190°C). Line a loaf pan with parchment paper.
- Bake: Transfer dough into the pan, smooth the top, and bake for 45–50 minutes until golden.
- Cool completely: Let rest briefly, then cool fully on a wire rack before slicing.
Notes
Storage & Texture Tips
- Cool completely before storing
- Store airtight: 3 days room temp, 7 days fridge, 1 month frozen
- Slice with a serrated knife
- Skip a second rise—gluten-free dough may deflate
- Mix thoroughly for best structure
Flavor & Nutrition Boosts
- Herbs: rosemary, thyme, garlic powder
- Seeds: sunflower, flax, chia
- Sweet: cinnamon + maple syrup
- Protein boost: hemp seeds or plant-based protein
- Moisture boost: grated zucchini or carrot
Nutrition
HOW TO MAKE GLUTEN FREE BREAD RECIPE

Step-by-step instructions
- Activate the yeast
Combine warm water, sugar (or honey), and yeast. Let sit 5–10 minutes until foamy. - Mix dry ingredients
Whisk together gluten-free flour, psyllium husk powder, and salt. - Combine wet ingredients
In a separate bowl, whisk eggs, olive oil, and apple cider vinegar. Add yeast mixture. - Form the dough
Mix wet and dry ingredients thoroughly. The dough will be thick and sticky, similar to batter. - Let the dough rise
Cover and let rise in a warm place for 45–60 minutes until nearly doubled. - Preheat and prepare
Preheat oven to 375°F (190°C). Line a loaf pan with parchment paper. - Bake
Transfer dough into the pan, smooth the top, and bake for 45–50 minutes until golden. - Cool completely
Let rest briefly, then cool fully on a wire rack before slicing.
Prep and cook timing tips
- Prep time: 15 minutes
- Rise time: 45–60 minutes
- Bake time: 45–50 minutes
- Cooling time: At least 1 hour before slicing
Tip: Don’t rush the cooling step — gluten-free breads need time to set. Slicing too early can make the inside gummy.
TIPS & FLAVOR VARIATIONS
Storage & Texture Tips
- Cool completely before storing
- Store airtight: 3 days room temp, 7 days fridge, 1 month frozen
- Slice with a serrated knife
- Skip a second rise—gluten-free dough may deflate
- Mix thoroughly for best structure
Flavor & Nutrition Boosts
- Herbs: rosemary, thyme, garlic powder
- Seeds: sunflower, flax, chia
- Sweet: cinnamon + maple syrup
- Protein boost: hemp seeds or plant-based protein
- Moisture boost: grated zucchini or carrot
FINAL HEALTH BENEFITS OF GLUTEN FREE BREAD RECIPE
Recap health or weight loss benefits
Homemade gluten-free bread supports a less processed diet and gives full control over sugar, salt, and additives. When made with whole-grain gluten-free flours, it delivers fiber, minerals, and sustained energy.
It may also reduce bloating, fatigue, and digestive discomfort associated with gluten sensitivity.
Pros and cons table
| Pros | Cons |
|---|---|
| Naturally gluten-free | Shorter shelf life |
| Customizable | Requires specific ingredients |
| Cost-effective | Learning curve |
| Digestive-friendly | Texture sensitive |
| Fresh and flavorful | Cooling time required |
For more inspiration beyond bread, check out our easy gluten free baking guide that covers cookies, muffins, and more.
COMMON MYTHS & MISTAKES
Myth 1: “Gluten-Free Bread Doesn’t Taste Good”
This myth comes from early gluten-free products that relied heavily on refined starches and lacked proper structure. Today, modern gluten-free bread recipes use balanced flour blends, healthy fats, and effective binders like psyllium husk or xanthan gum to create loaves that are both flavorful and satisfying.
By combining whole-grain gluten-free flours such as sorghum, millet, or brown rice with ingredients like olive oil or eggs, gluten-free bread can develop depth of flavor, softness, and a pleasant chew. When baked properly, many people are surprised to find that gluten-free bread rivals—or even surpasses—traditional wheat bread in taste, especially when enjoyed fresh.
Myth 2: “Gluten-Free Bread Is Just Regular Bread With Different Flour”
Gluten-free bread behaves very differently from wheat-based bread. Without gluten, the dough cannot stretch or trap air in the same way, which is why gluten-free dough typically looks more like a thick batter than elastic dough.
Because of this, gluten-free bread requires higher hydration, binding agents, and different mixing techniques. Kneading is unnecessary, overmixing is rarely an issue, and a second rise is often avoided. Understanding these differences is key to achieving a successful gluten-free loaf and avoiding common problems like collapse or gumminess.
Myth 3: “Gluten-Free Bread Is Healthier for Everyone”
While gluten-free bread is essential for people with celiac disease or gluten sensitivity, it is not automatically healthier for everyone. Many store-bought gluten-free breads rely on refined starches, added sugars, and preservatives, which can reduce their nutritional value.
Homemade gluten-free bread made with whole-food ingredients offers a much better option. Using nutrient-dense flours, natural fats, and minimal additives allows you to control fiber content, sugar levels, and overall quality. For those who don’t need to avoid gluten, the health benefits depend entirely on ingredient choices—not the absence of gluten alone.
Why Does Gluten-Free Bread Turn Out Dense or Gummy?
Gluten-free bread can sometimes feel dense or gummy when the balance of ingredients or technique is off. This often happens if the batter isn’t mixed thoroughly, if there’s too much moisture, or if the loaf is sliced before it has fully set.
Because gluten-free dough relies on binders rather than gluten for structure, ingredients like psyllium husk or xanthan gum are essential for trapping air and creating a light crumb. Skipping or reducing these binders can lead to a heavy texture.
For best results, make sure the dough is well combined, bake the loaf completely, and allow it to cool fully before slicing. Giving the bread enough time to set helps prevent gumminess and improves overall texture.
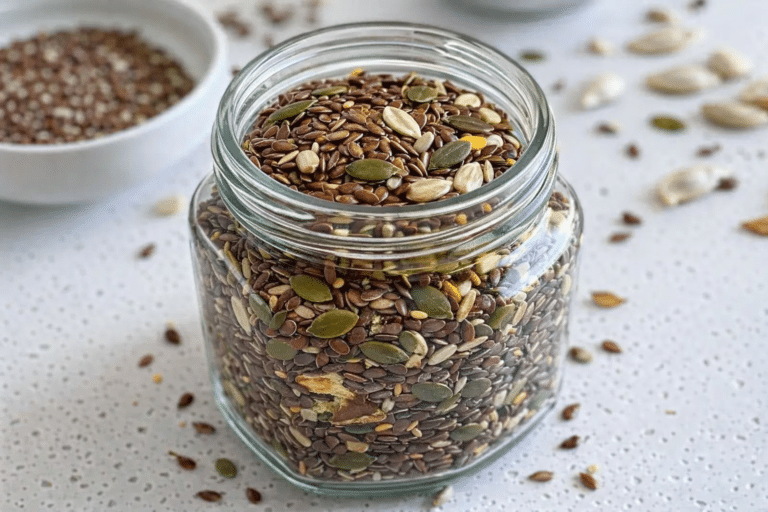
What Binders Can I Use in Gluten-Free Bread?
Gluten-free bread relies on binders to replace the structure and elasticity that gluten normally provides. The most commonly used binders include xanthan gum, psyllium husk, and chia seeds.
Xanthan gum helps improve elasticity and prevents crumbling, while chia seeds and ground flaxseeds add binding power along with fiber. Psyllium husk is often the preferred option because it absorbs moisture and creates a flexible, dough-like structure, resulting in a softer crumb and a pleasantly chewy texture that closely mimics traditional bread.
How to Store Gluten-Free Bread So It Stays Fresh Longer
To keep gluten-free bread fresh, store it in an airtight container once it has completely cooled. At room temperature, it typically stays fresh for about 2–3 days, depending on humidity.
For extended storage, refrigerate the bread for up to 7 days, ensuring it’s well sealed to prevent drying. Freezing is the best long-term option—slice the loaf before freezing and place parchment paper between slices. This allows you to remove individual pieces without thawing the entire loaf, preserving both texture and flavor.
Can I Replace Ingredients in Gluten-Free Bread?
Yes, gluten-free bread recipes are flexible, but substitutions should be made carefully. You can swap flour blends by using alternatives such as gluten-free oat flour or buckwheat flour, replace eggs with flax eggs, or use plant-based liquids like almond or oat milk instead of dairy.
Keep in mind that each substitution can affect moisture levels, structure, and rise. When making changes, it’s best to adjust ratios gradually and monitor the dough’s consistency to maintain a soft, well-balanced loaf.
FINAL THOUGHTS
Friendly encouragement to try the recipe
Making gluten-free bread at home is a rewarding step toward mindful eating. Whether you’re managing celiac disease, gluten sensitivity, or simply exploring gluten-free baking, this recipe provides a dependable foundation.
Start with the base loaf, adjust it to your taste, and enjoy the comfort of fresh, homemade gluten-free bread.