Crumb Cake Muffins (Bakery-Style, Cozy & Family-Approved)
Hi, I’m Helen Whitaker — welcome to Cookliva.
There’s something about crumb cake muffins that instantly slows life down for me. Maybe it’s the buttery scent that fills the kitchen as they bake, or the way the crumb topping turns golden and slightly crisp while staying soft underneath. These are the kinds of muffins I make on quiet weekend mornings, usually while my husband Mark is making coffee and the kids — Emma and Lucas — are still in pajamas, wandering into the kitchen asking, “Are those for breakfast?”
These crumb cake muffins weren’t created for special occasions or picture-perfect brunch tables. They came from a simple desire: a soft, tender muffin with a thick, generous crumb topping — the kind you’d expect from a cozy neighborhood bakery, but made right at home without stress. Over the years, I’ve tested, tweaked, and baked these muffins more times than I can count, adjusting textures, sweetness, and crumb ratios until they felt just right.
They’ve become a staple in our house. I make them for school mornings when I want something comforting but practical. I bake a batch when family visits. And sometimes, I make them just because the house feels a little too quiet and baking feels like the right way to fill the space.
Let me walk you through everything — slowly, calmly, and with intention — just like I’d do if you were standing beside me in my kitchen.

Why You’ll Love This Recipe
These crumb cake muffins are all about balance. Not too sweet, not too heavy, and never dry. Here’s why they’ve earned a permanent spot in my recipe box:
- A thick, bakery-style crumb topping that doesn’t melt into the batter
- Soft, tender muffin base with a buttery vanilla flavor
- Simple pantry ingredients you likely already have
- Perfect for breakfast or afternoon snacks
- Freezer-friendly for busy weeks
- Kid-approved (Emma always asks for seconds)
They feel indulgent without being overwhelming, which is exactly how I like my everyday baking.
The Origin of This Recipe
I’ve always loved crumb cake — the classic kind you slice and serve with coffee. But muffins feel more practical for everyday life, especially with kids. Years ago, I started experimenting with turning that familiar crumb cake experience into a muffin form.
The first few tries were fine, but not memorable. The crumb topping either sank into the batter or turned sandy and dry. The muffins themselves were sometimes too dense, sometimes too airy.
One rainy afternoon, while Lucas was napping and Emma was coloring at the kitchen table, I slowed down and paid closer attention. I adjusted the fat ratio in the crumb topping, changed how I mixed the batter, and focused on texture instead of speed. That batch came out of the oven smelling like pure comfort.
Mark took one bite and said, “These taste like they came from a bakery.”
That’s when I knew this recipe was staying.
Ingredients
Let’s talk through the ingredients — not just what they are, but why they matter.
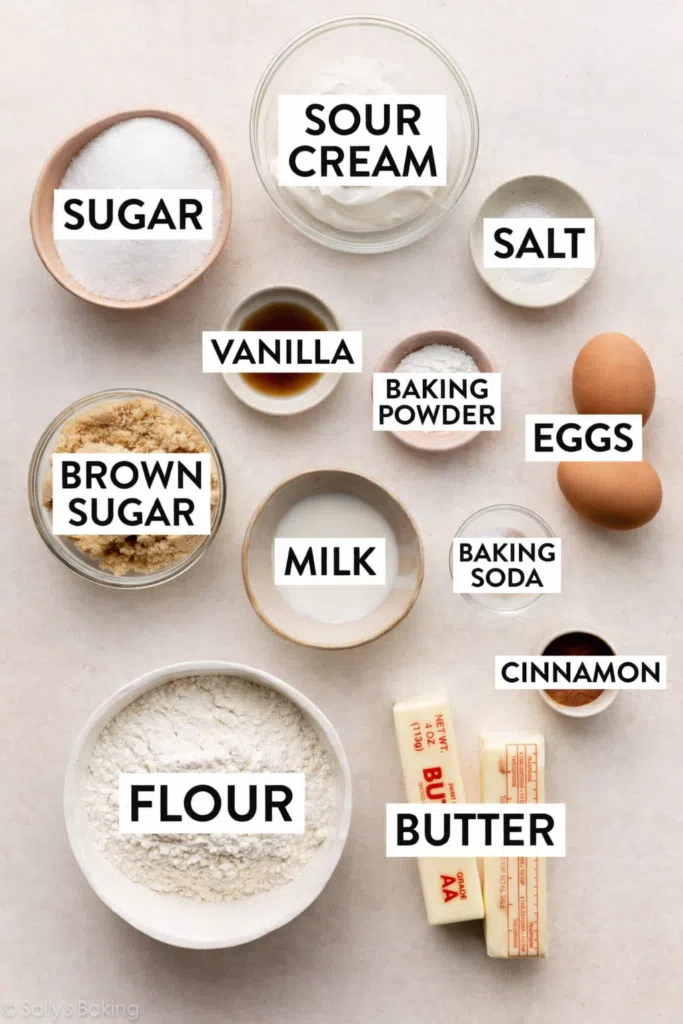
For the Crumb Topping
- All-purpose flour – Provides structure so the crumbs stay defined
- Brown sugar – Adds moisture and a subtle caramel depth
- Granulated sugar – Balances sweetness and crispness
- Ground cinnamon – Warm and comforting without overpowering
- Salt – Keeps the sweetness from tasting flat
- Unsalted butter (melted) – The key to rich, bakery-style crumbs
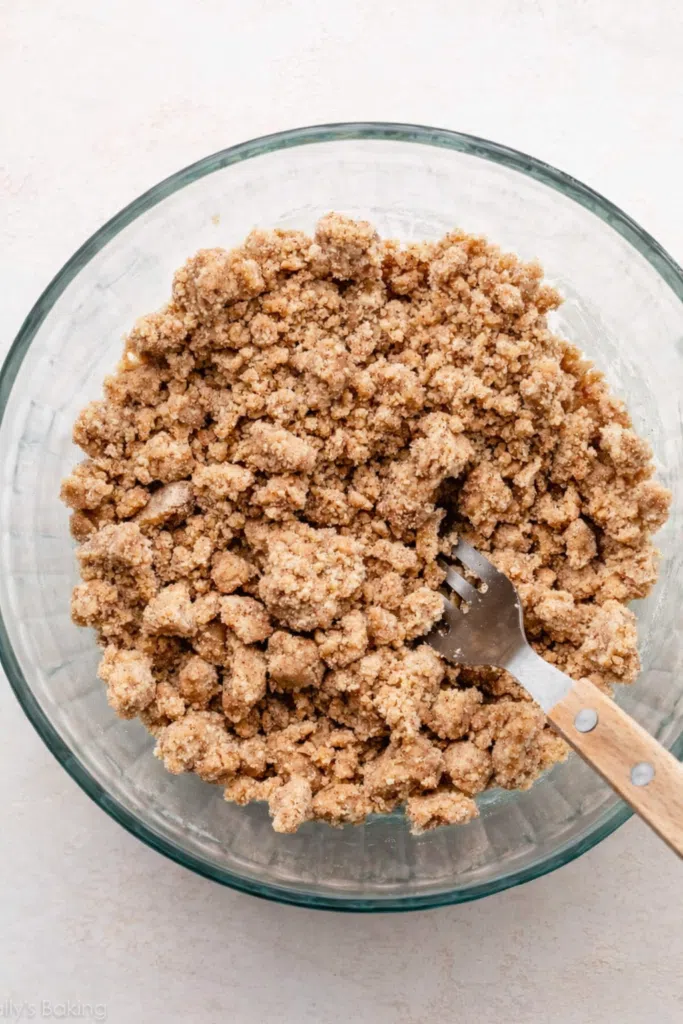
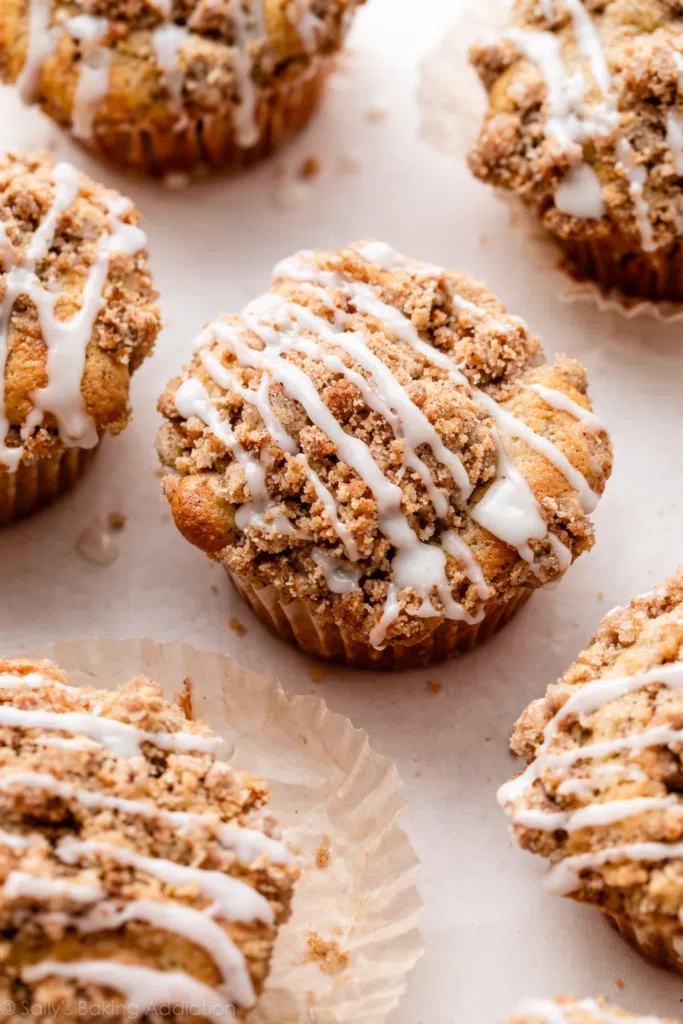
The crumb topping should look chunky and uneven — that’s exactly what you want.
For the Muffins
- All-purpose flour – Gives the muffins stability while staying soft
- Baking powder – Creates lift for a tender crumb
- Salt – Enhances flavor
- Unsalted butter (softened) – Adds richness and moisture
- Granulated sugar – Sweetens without overpowering
- Eggs – Bind everything together
- Sour cream or yogurt – Keeps the muffins moist for days
- Milk – Loosens the batter just enough
- Vanilla extract – Adds warmth and depth
Each ingredient works quietly in the background, supporting texture and flavor without demanding attention.
Instructions
Take your time here. These muffins don’t require complicated steps — just a little patience.
Step 1: Prepare the Crumb Topping
In a bowl, mix the flour, sugars, cinnamon, and salt. Pour in the melted butter and gently stir with a fork until large crumbs form. Set aside. This resting time helps the crumbs firm up slightly, which keeps them from melting into the muffins later.
Step 2: Mix the Dry Ingredients
In another bowl, whisk together the flour, baking powder, and salt. This ensures even distribution so your muffins rise evenly.

Step 3: Cream Butter and Sugar
In a large bowl, cream the softened butter and sugar until light and fluffy. This step adds air, which keeps the muffins tender rather than dense.
Step 4: Add Eggs and Flavor
Mix in the eggs one at a time, followed by the vanilla. Don’t rush — letting each egg fully incorporate makes a difference.
Step 5: Add Sour Cream and Milk
Stir in the sour cream and milk gently. The batter should look smooth and slightly thick.
Step 6: Combine Wet and Dry
Add the dry ingredients to the wet mixture and fold gently until just combined. Overmixing leads to tough muffins, and we want softness here.
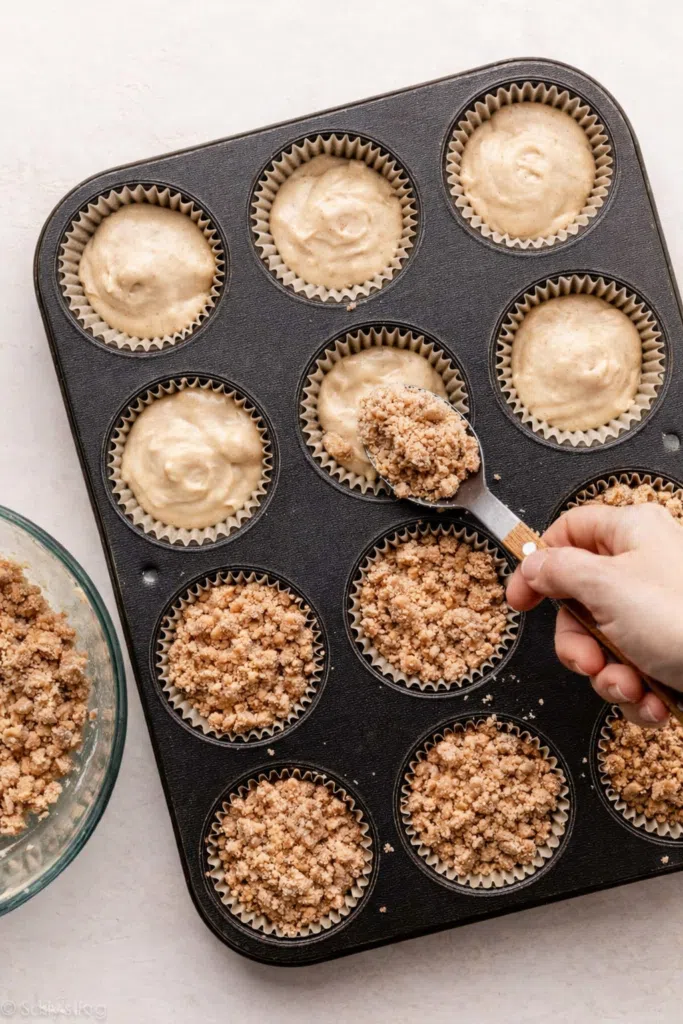
Step 7: Fill and Top
Scoop batter into lined muffin tins, filling each about ¾ full. Pile the crumb topping generously on top — don’t be shy.
Step 8: Bake
Bake until the tops are golden and a toothpick inserted into the muffin (not the crumb) comes out clean. Let them cool slightly before serving.
Tips & Flavor Variations
Over time, I’ve played with this recipe in small ways. Here are a few options if you’d like to make it your own:
- Add chopped nuts (walnuts or pecans) to the crumb topping
- Swirl in fruit preserves for a surprise center
- Use vanilla bean paste for deeper flavor
- Add a light glaze if serving as dessert
- Make mini muffins for lunchboxes
On fall mornings, I sometimes add a pinch of nutmeg. In spring, I’ll stir lemon zest into the batter for brightness.
Common Myths & Mistakes
Myth 1: More mixing makes better muffins
Overmixing actually develops gluten, making muffins dense and chewy. Gentle mixing is key.
Myth 2: Crumb topping should be fine and sandy
Chunky crumbs create texture and bakery-style appearance.
Myth 3: Muffins must be eaten same day
These stay moist for several days when stored properly.
Myth 4: Butter must be cold for crumb topping
Melted butter creates richer, more cohesive crumbs here.
FAQ
Can I make these ahead of time?
Yes. I often bake them the night before school mornings.
How should I store them?
Store at room temperature in an airtight container for up to 3 days, or refrigerate for 5 days.
Can I freeze them?
Absolutely. Freeze individually wrapped muffins for up to 2 months.
Can I use Greek yogurt instead of sour cream?
Yes — full-fat Greek yogurt works beautifully.
Why did my crumb topping sink?
Most likely the butter was too hot or the crumbs were too fine.
These crumb cake muffins remind me why I love baking in the first place. They’re not flashy or complicated. They’re steady, comforting, and made to be shared — usually with coffee in hand and kids nearby asking if they can have “just one more.”
That’s what Cookliva is all about.